
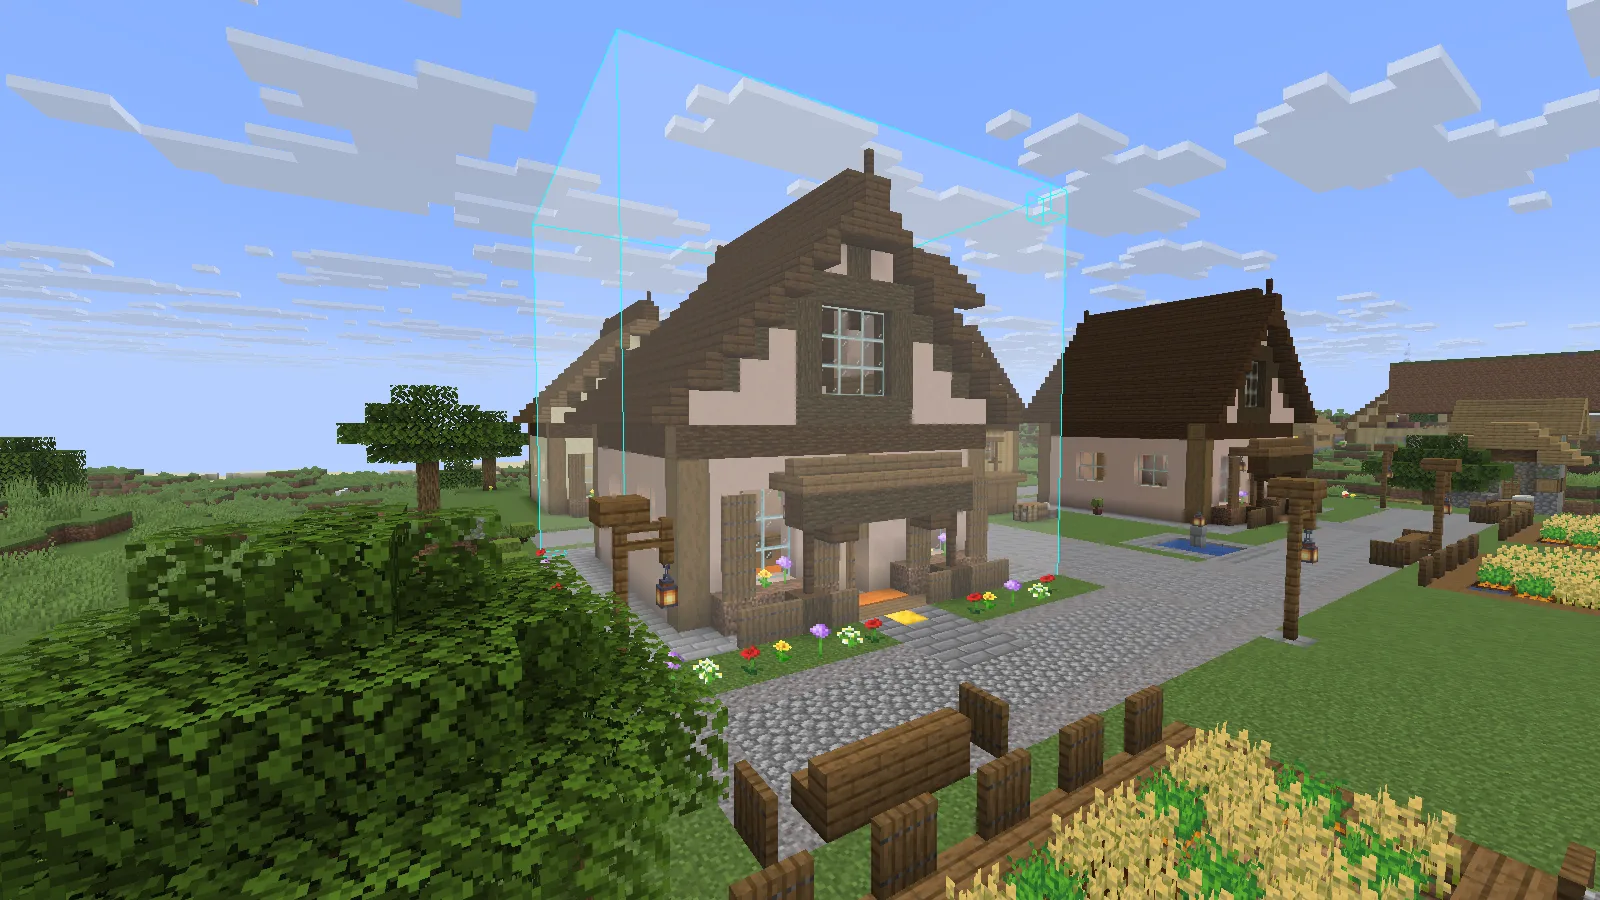
A cottage can look finished while one wall block is missing, an oak plank has slipped into a spruce floor, or a stair faces the wrong way. Walking around the outside will not tell you which of those is keeping the build from matching its schematic. Litematica’s Schematic Verifier gives you an Expected block, a Found block and a count, then lets you mark the positions you need to repair.
The useful part is the difference between those two columns. A missing block needs adding; an extra block needs removing; a wrong block needs replacing. A wrong state can use exactly the right block but still need placing differently. Here is how to work through those last few discrepancies in a cottage, one repair at a time.
Open the verifier for the right placement
Press M and open Schematic Placements. Check the placement’s name and origin before selecting it: two placements made from the same schematic file can refer to different places in the world. Choose the one for the build you want to finish, then open Configure. Here, Modonix Workshop is selected and the separate Garden Copy placement is switched off.
Check the selected placement’s origin, rotation and mirror settings against where you have built it. This example uses Rotation: NONE, Mirror: NONE and Locked: ON. Keep the reference in place while you work on the blocks.
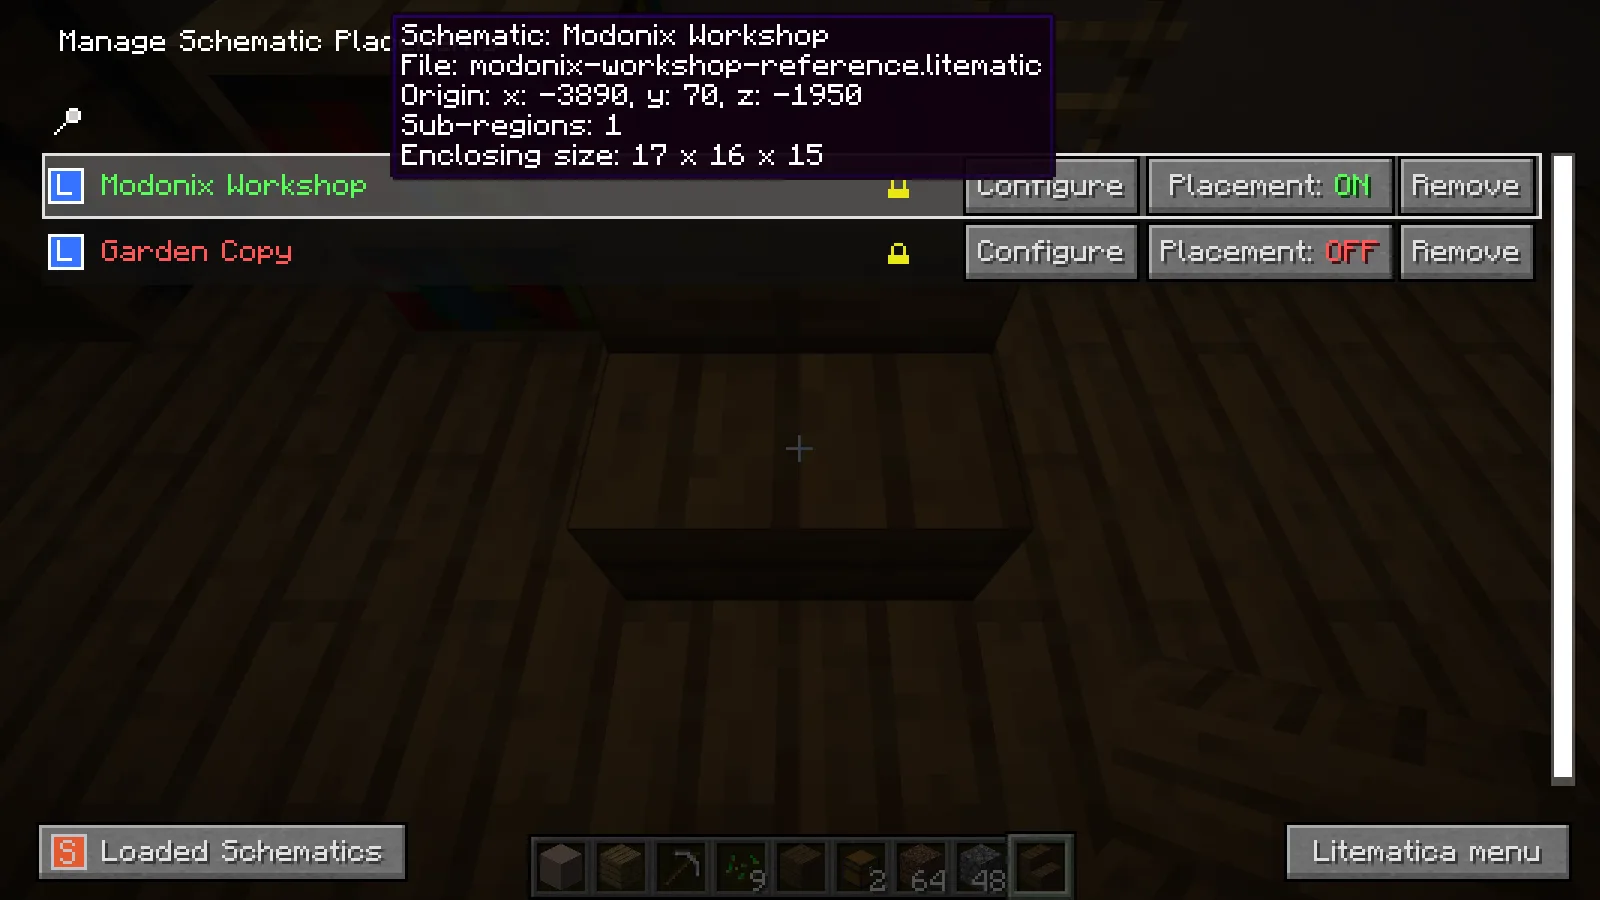
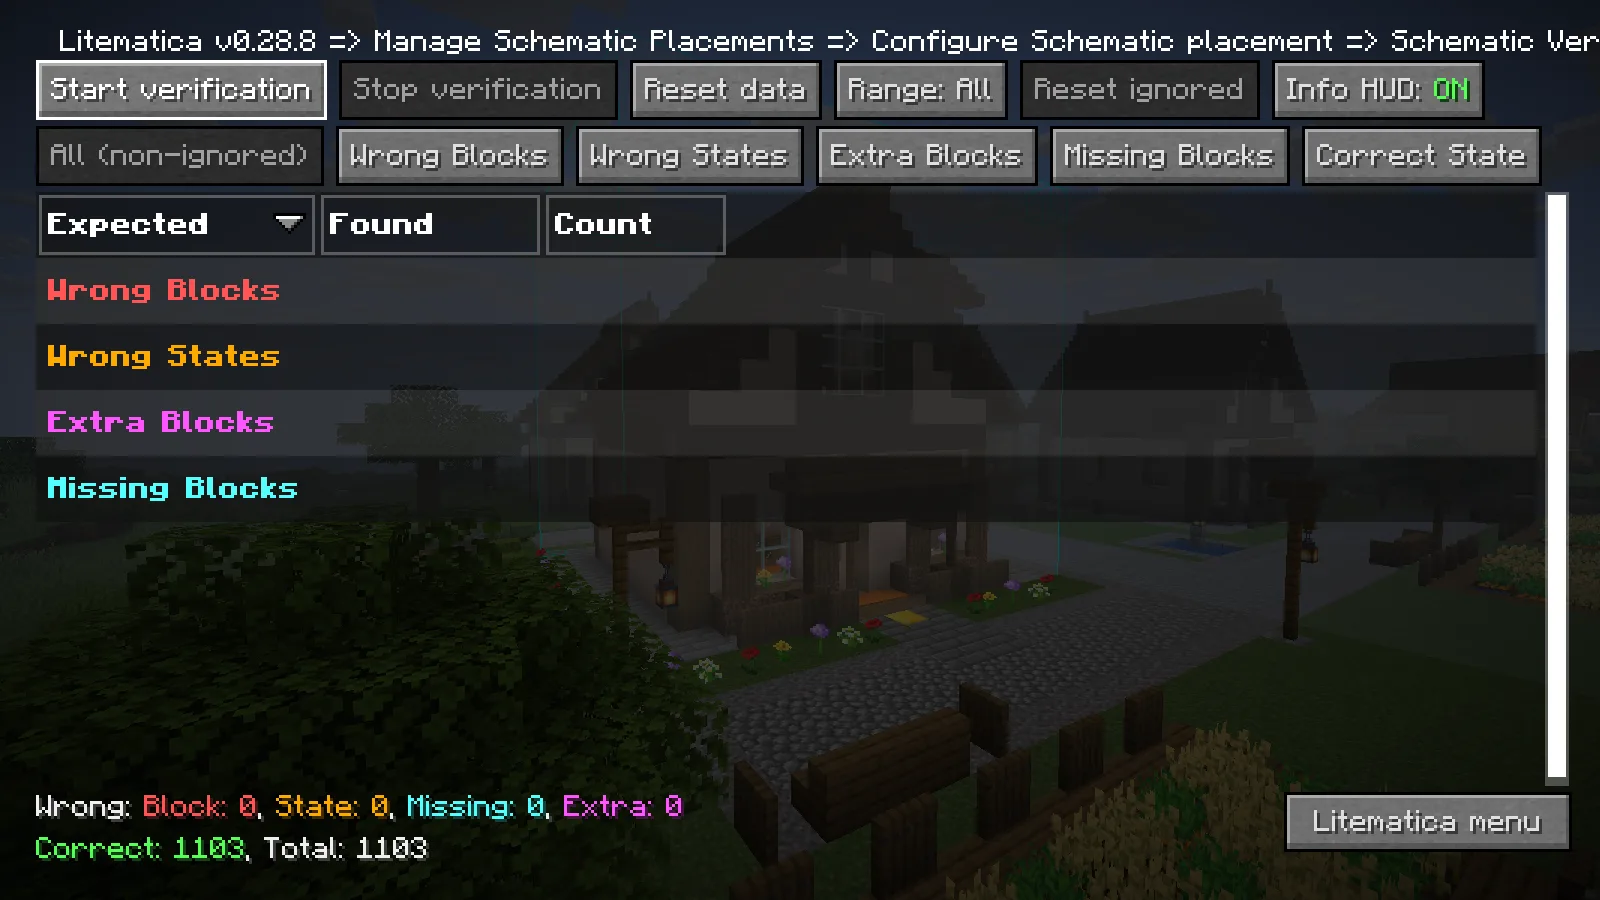
From that placement’s configuration, open Schematic Verifier, set Range: All and click Start verification. Read the discrepancy categories and the counts at the bottom.
To locate a listed discrepancy, click its data row, where Expected, Found and Count appear. Clicking the Expected or Found column header sorts the list; it does not select the row’s markers. After selecting a row, use Shift + Esc to leave the Litematica menus and return to the build.
After each repair, reopen the verifier and use Reset data → Start verification for a fresh comparison. Work on one discrepancy at a time so you can see which edit clears it.
Missing wall block: add what Expected names
The missing-block example is a gap in the white terracotta wall. The verifier lists Expected: White Terracotta, Found: Air, Count: 1 under Missing Blocks. That tells you what belongs in the gap, rather than simply saying the cottage is one block short.
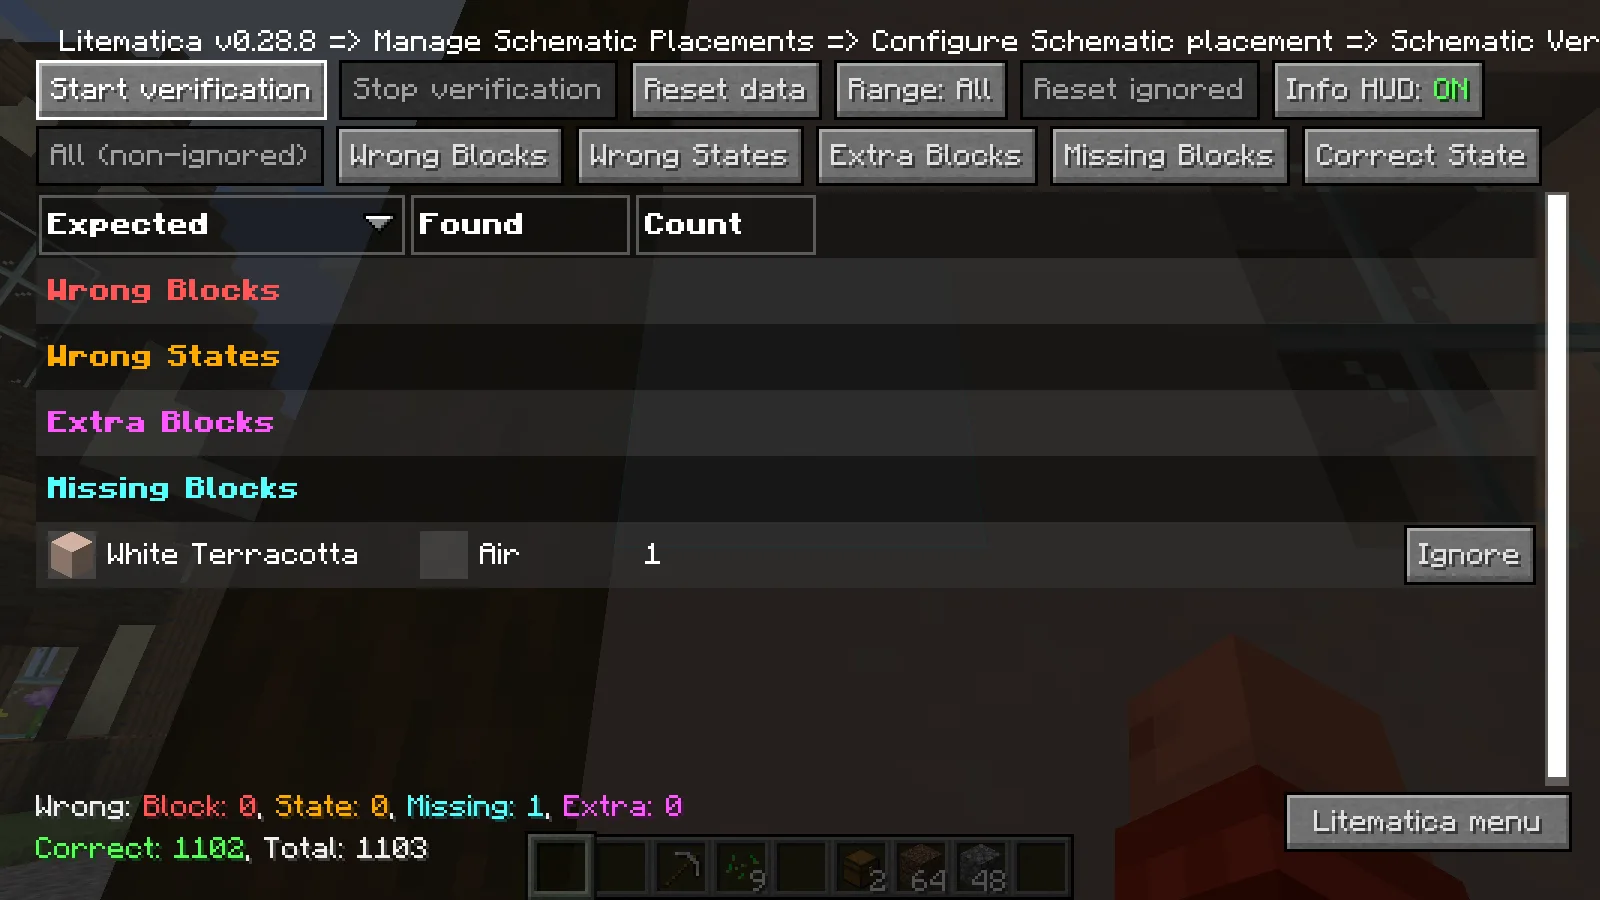
Click that row to select its markers, then leave the menus. The cyan marker shown here picks out the missing wall position. Follow it to the gap and place White Terracotta there. You do not need to rebuild the surrounding wall or move the schematic to make the count look right. With the terracotta restored, the fresh scan returns Missing to zero.
Extra block in the passage: remove it
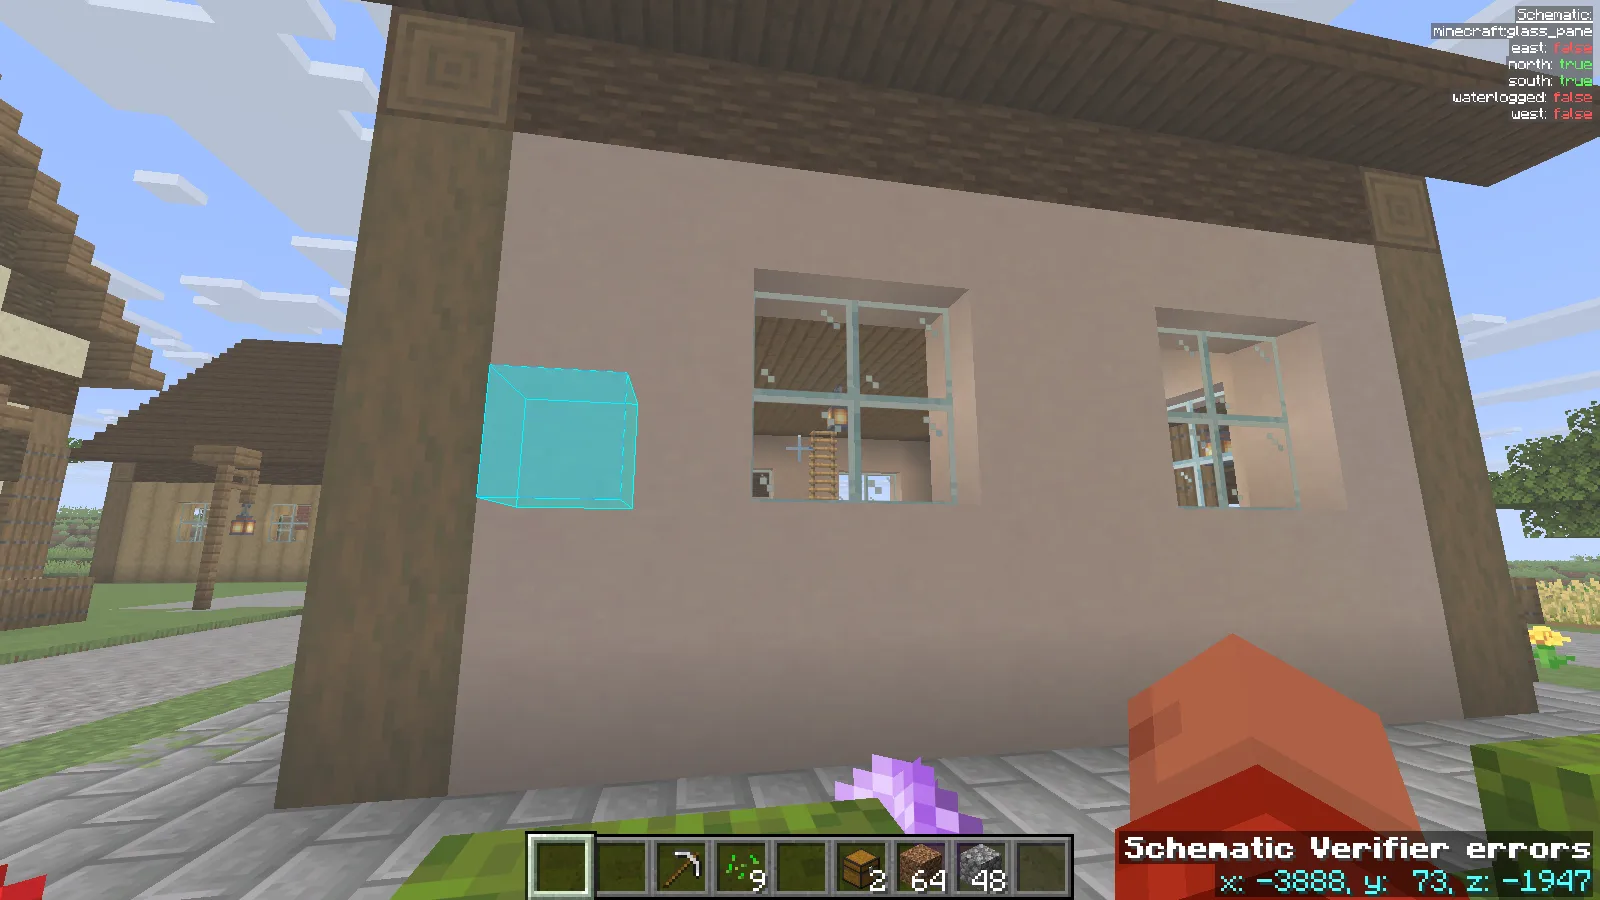
An extra block is the reverse situation. The cottage’s passage contains one Oak Planks block where the schematic expects clear space. The row reads Expected: Air, Found: Oak Planks, Count: 1 under Extra Blocks.
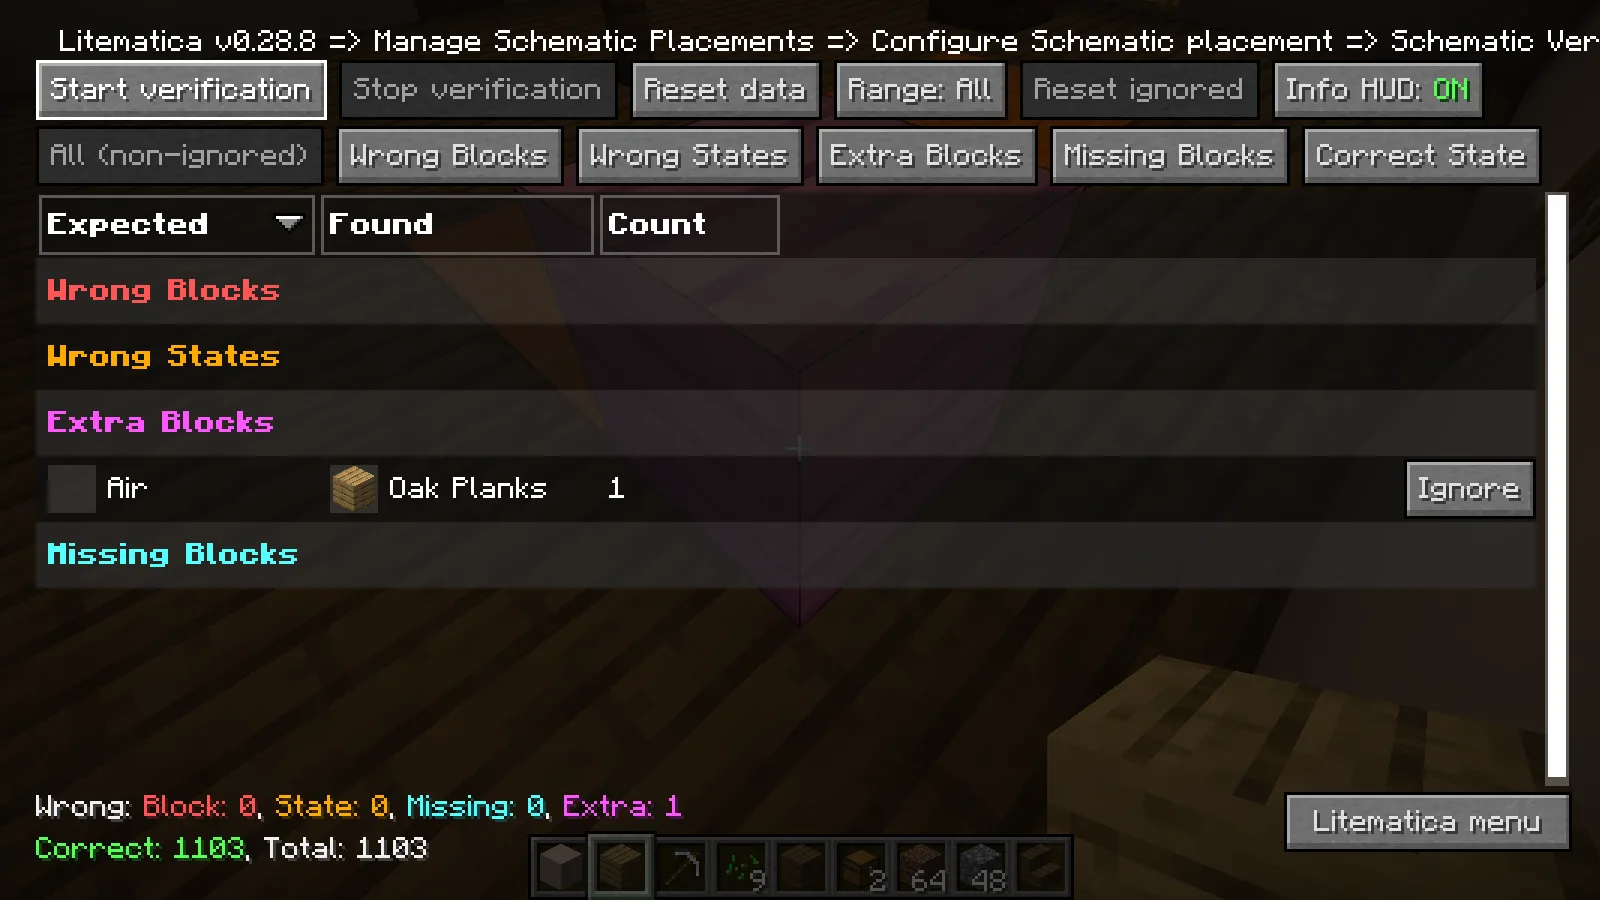
Select the row and return to the world. Its magenta marker shown here identifies the oak block in the passage. Remove that block: Air in the Expected column means the position should be empty, so replacing oak with another building material would leave the problem unresolved.
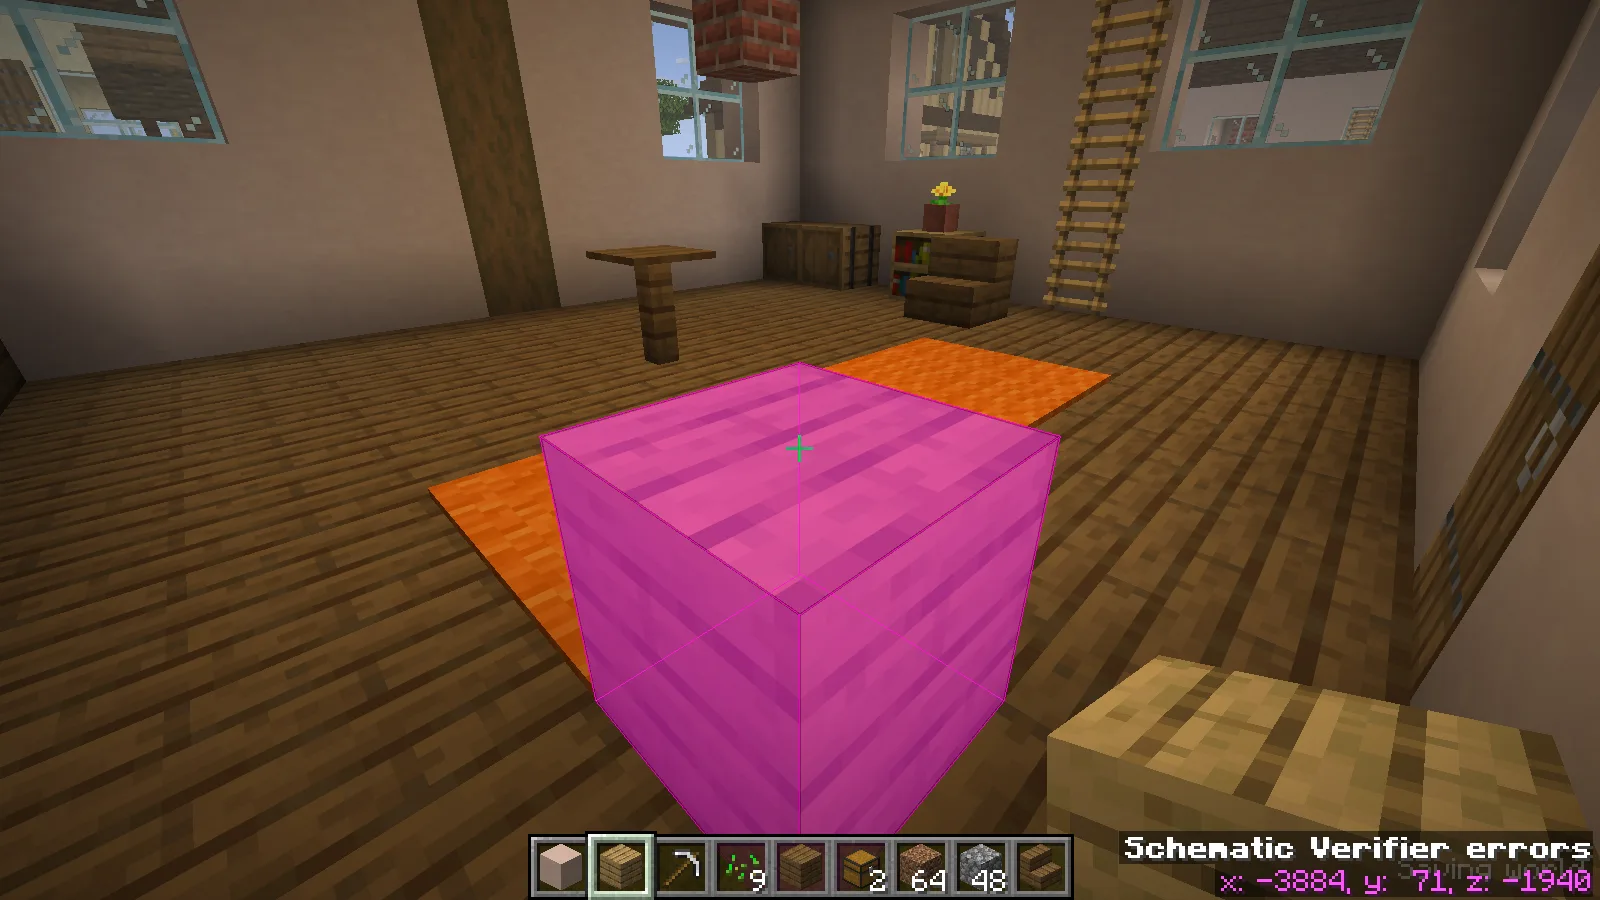
After removing the oak plank, the fresh scan returns Extra to zero. A stray block can look like part of the floor or trim; read the Expected column before deciding to fill the marked position.
Wrong floor material: replace the block
A wrong block can occupy the right position and still be the wrong material. In the cottage’s spruce floor, one oak plank produces Expected: Spruce Planks, Found: Oak Planks, Count: 1 under Wrong Blocks, shown here in red.
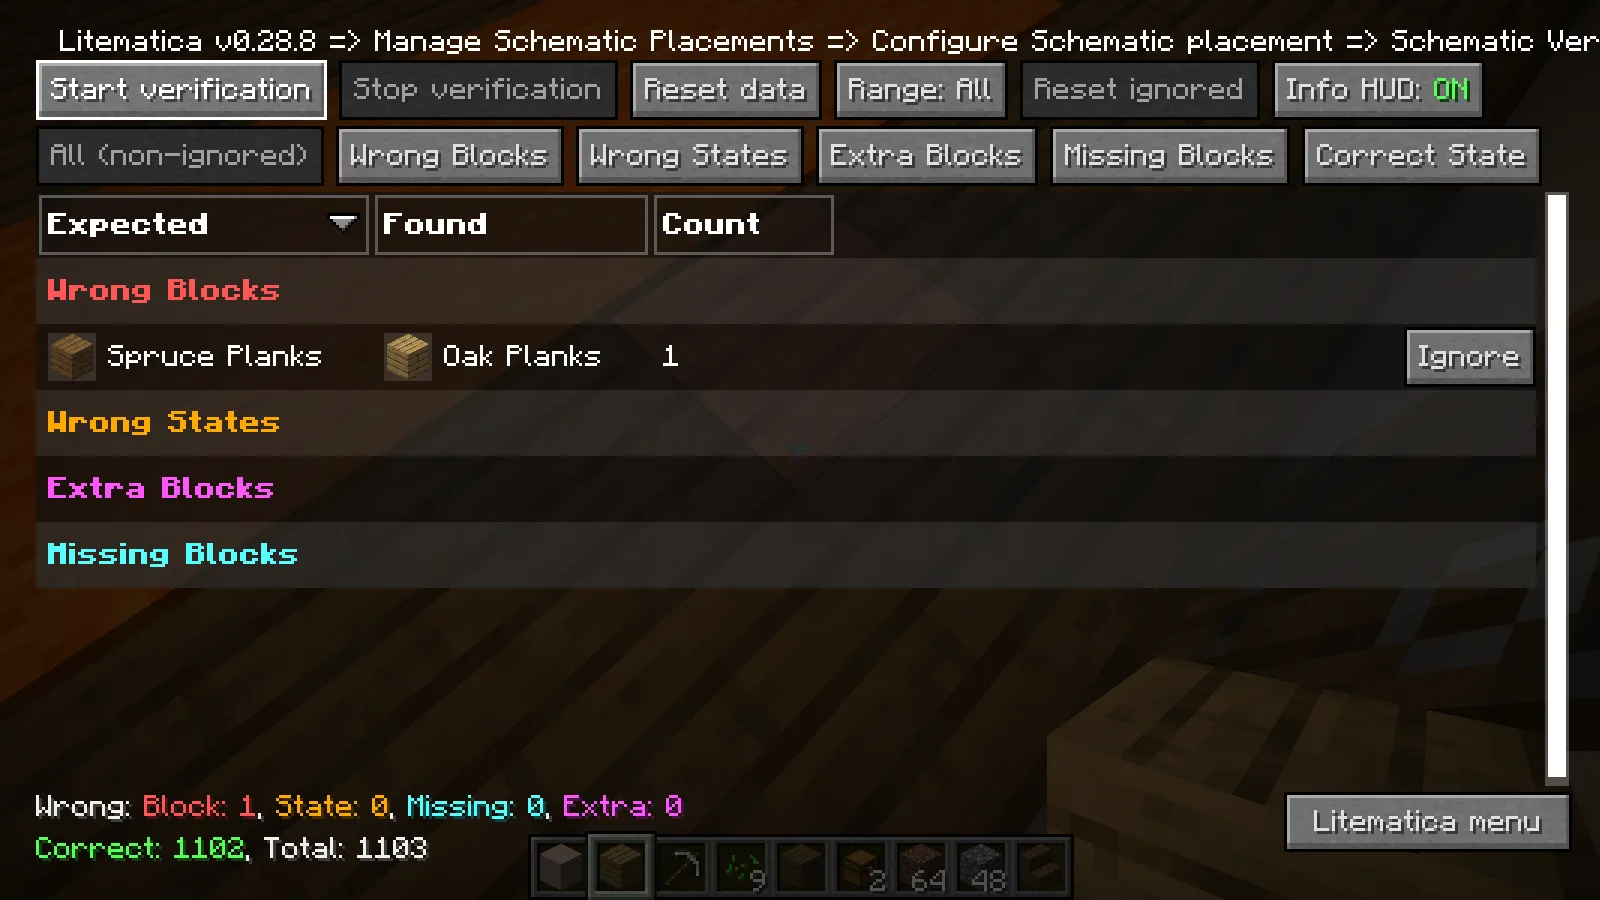
Use the row to find that position, break the oak plank and put Spruce Planks in its place. Keep the repair focused on the marked block rather than changing the neighbouring floor. The fresh comparison returns Wrong Blocks to zero when the material matches.
Right stair, wrong direction: inspect its state
The trickier case uses Spruce Stairs on both sides. Expected and Found show the same block name, but the discrepancy appears under Wrong States, shown here in orange. Hover over the data row to compare the detailed states.
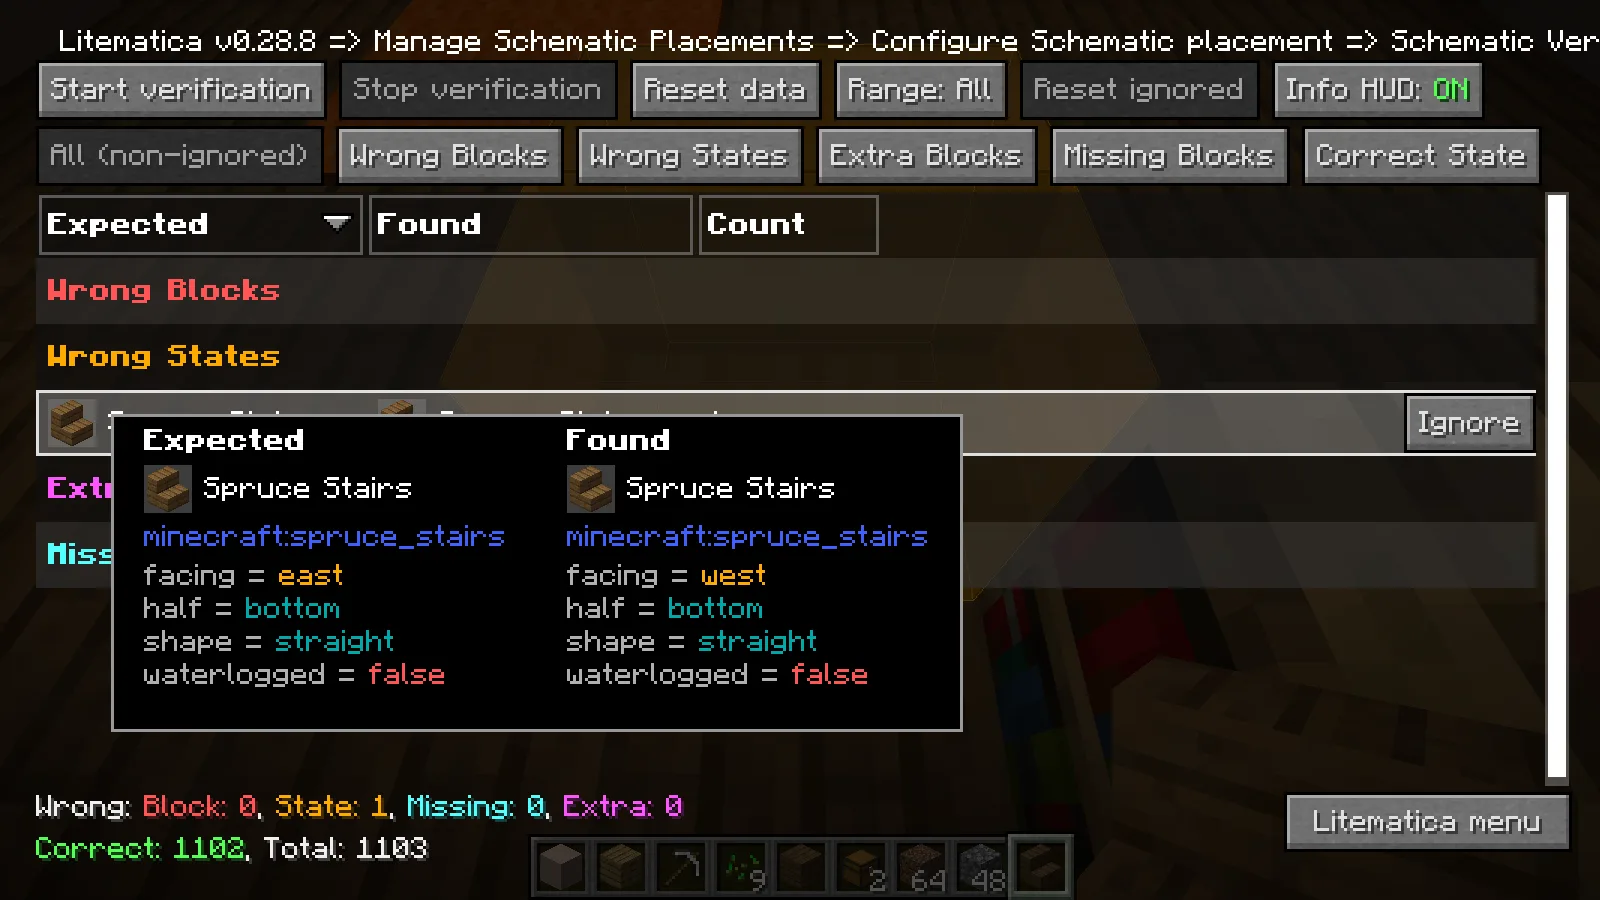
For this stair, Expected says facing = east and Found says facing = west. The other displayed values match: half = bottom, shape = straight and waterlogged = false. The material is right; the direction is not.
Break the stair and place it again from the opposite direction. The next fresh scan clears Wrong States. If a same-name block remains listed, compare the individual Expected and Found values instead of assuming that the correct material is enough.
Wait for unseen chunks before calling it finished
An empty discrepancy list can also mean the scan is still waiting. If the verifier shows Unseen Chunks, move back towards the build to load the missing area, or wait for it to load. An inactive Start verification button with Stop verification still active means the scan is running; empty rows at that point are not a clean result.
In this example, returning to the cottage allowed the running scan to finish without resetting it. Once the area loaded and the repairs were complete, the result was Wrong Blocks: 0, Wrong States: 0, Missing: 0, Extra: 0, alongside Correct: 1103, Total: 1103.
Comments 0
Share what worked, ask for help or reply to another player.
Use your Modonix account to join the discussion and manage your comments.
Sign in to commentNo comments yet. Share what worked for you.