
Miniature Shader suits a world you already like. The familiar blocks remain easy to recognize, while water and lighting give a riverside walk or an evening build a different mood. The best way to choose it is to look at an ordinary scene you might actually play in.
We used Miniature Shader 2.19 with Iris 1.11.4 on Java 26.2, at its Normal preset and with Minecraft's default textures.
The same river, with the shader off and on
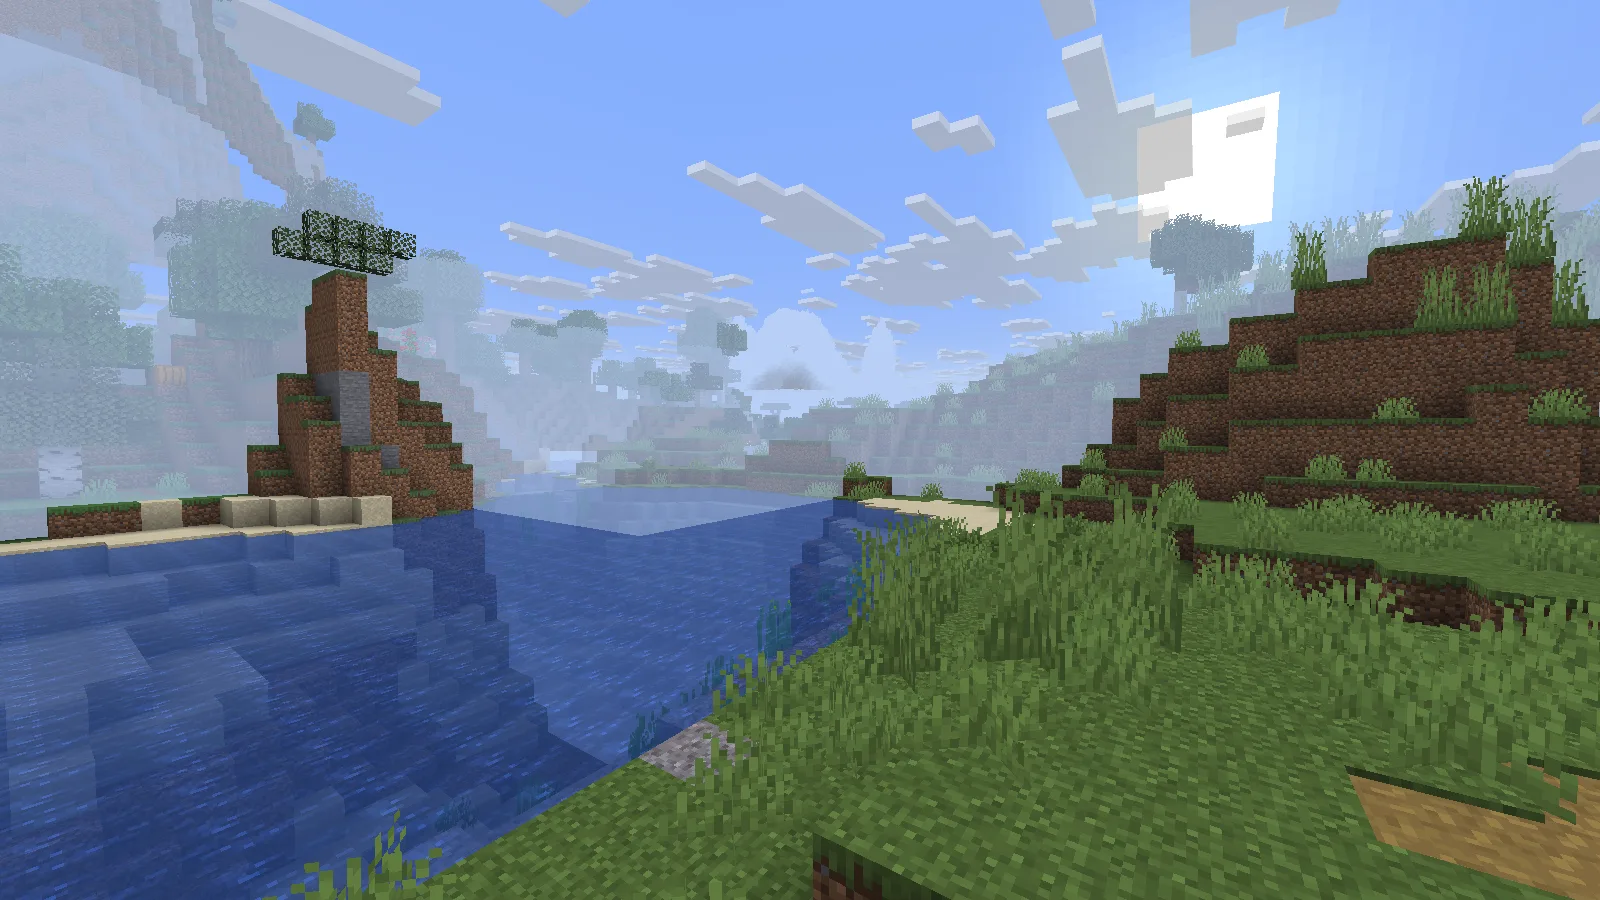
Shader off: the reference view, with the same camera and time as the next image.
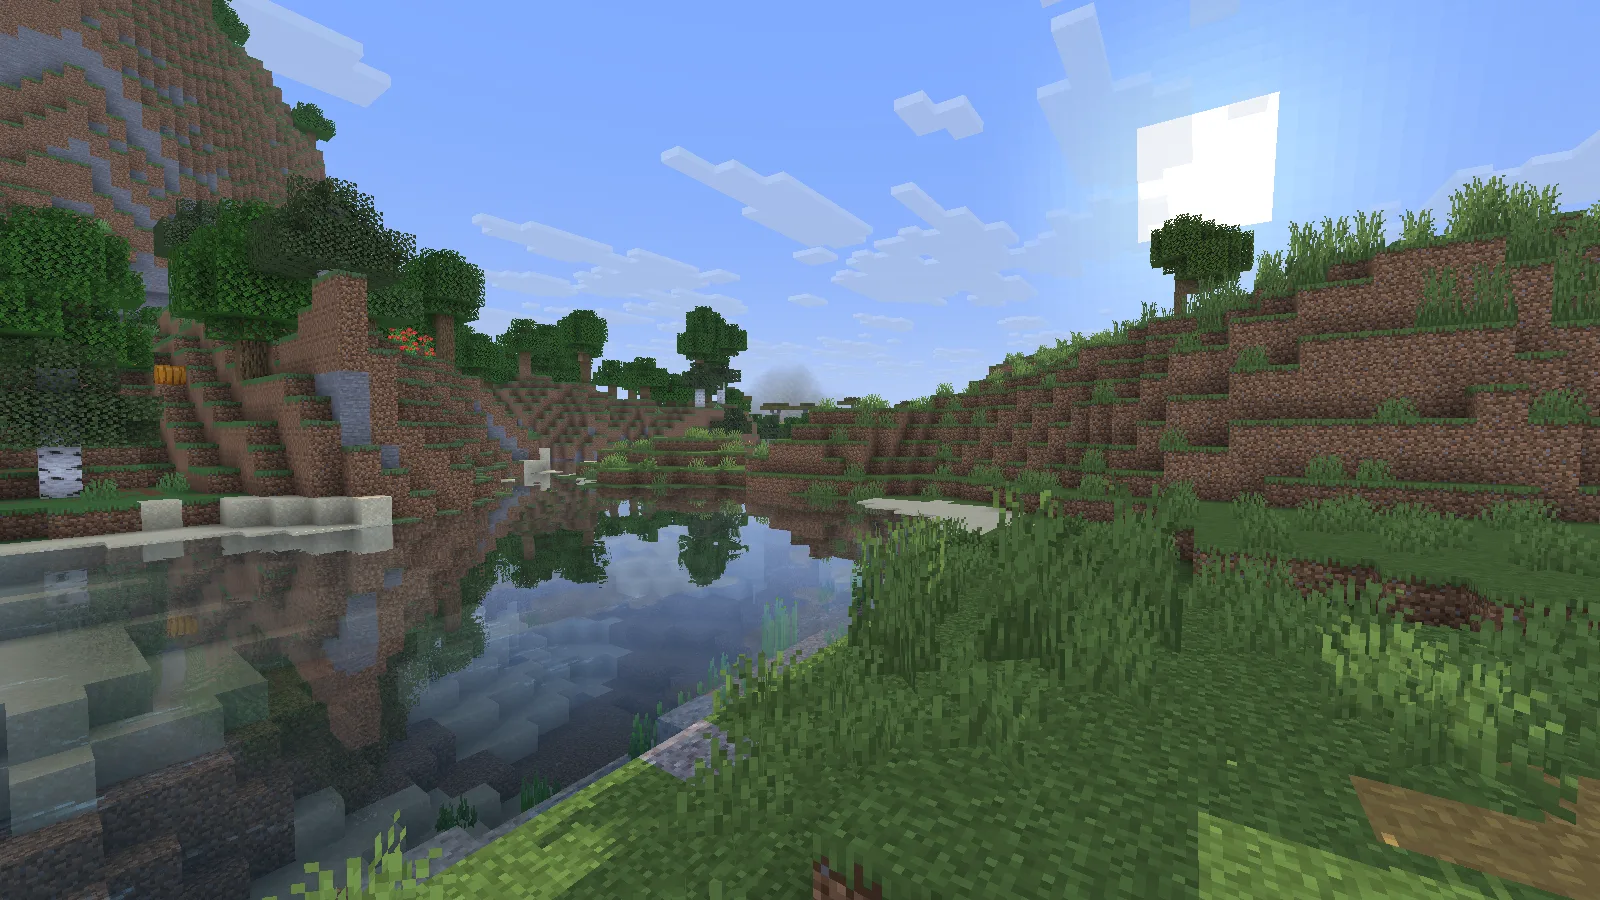
Shader on: compare the water surface and the light across the bank.
These views use the same camera position and time of day. Look across the water: reflections and the way light sits on the surface make the biggest difference. Close to the bank, you can still pick out the blocks below the water. The trees remain recognizably Minecraft rather than becoming realistic photographs.
This makes a modest river bend worth building around. A dock, a short bridge or a small landing can give you a place to pause and look across the water. Leave an open view between buildings instead of covering every bank with walls.
A house changes character after sunset
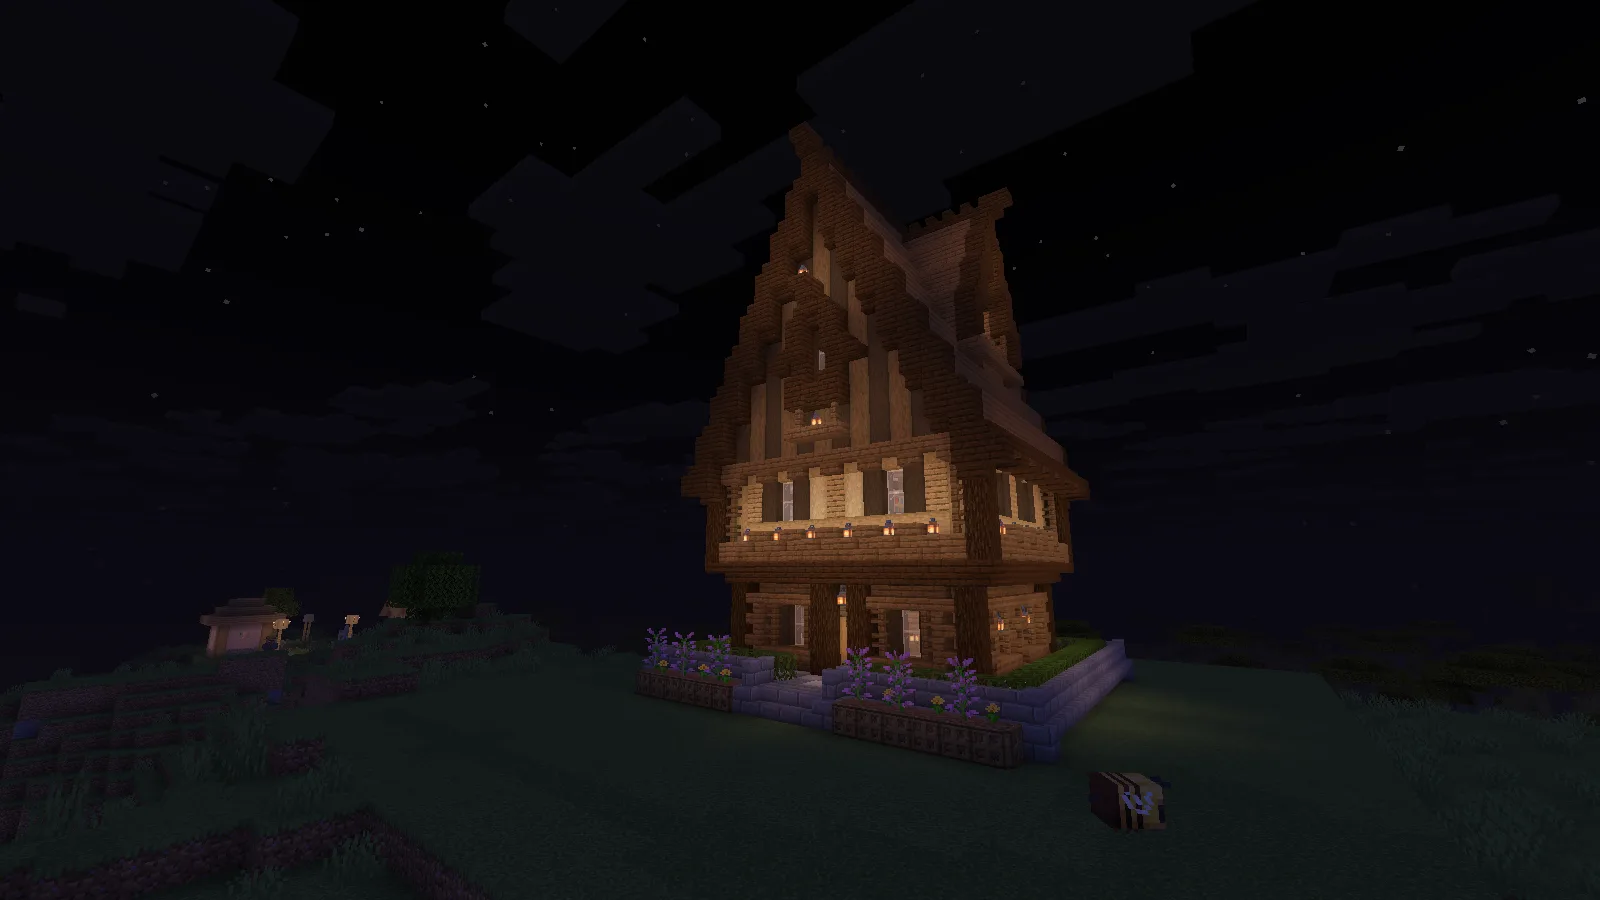
A few well-placed lights give the route home a clear focus.
At night, the lanterns around this house become the focus. The dark roof and sky frame the warmer light near the entrance. If you enjoy decorating, this is a reason to place lighting deliberately: around a doorway, along the route home and beside places where you stop to work.
The house comes from the Java schematic examples shown in our building guide. The shader changes its appearance; it does not include the house or place extra lamps for you.
Install with Iris
- Choose a compatible shader ZIP from Files. Match your Minecraft and shader-loader versions.
- Start your Iris-enabled Java installation. If you use a modpack, check whether Iris is already included before adding another copy.
- Open Video Settings → Shader Packs, then open the shader-pack folder.
- Put the Miniature Shader ZIP in that folder without extracting it.
- Select the ZIP in the list, enable shaders and apply the change.
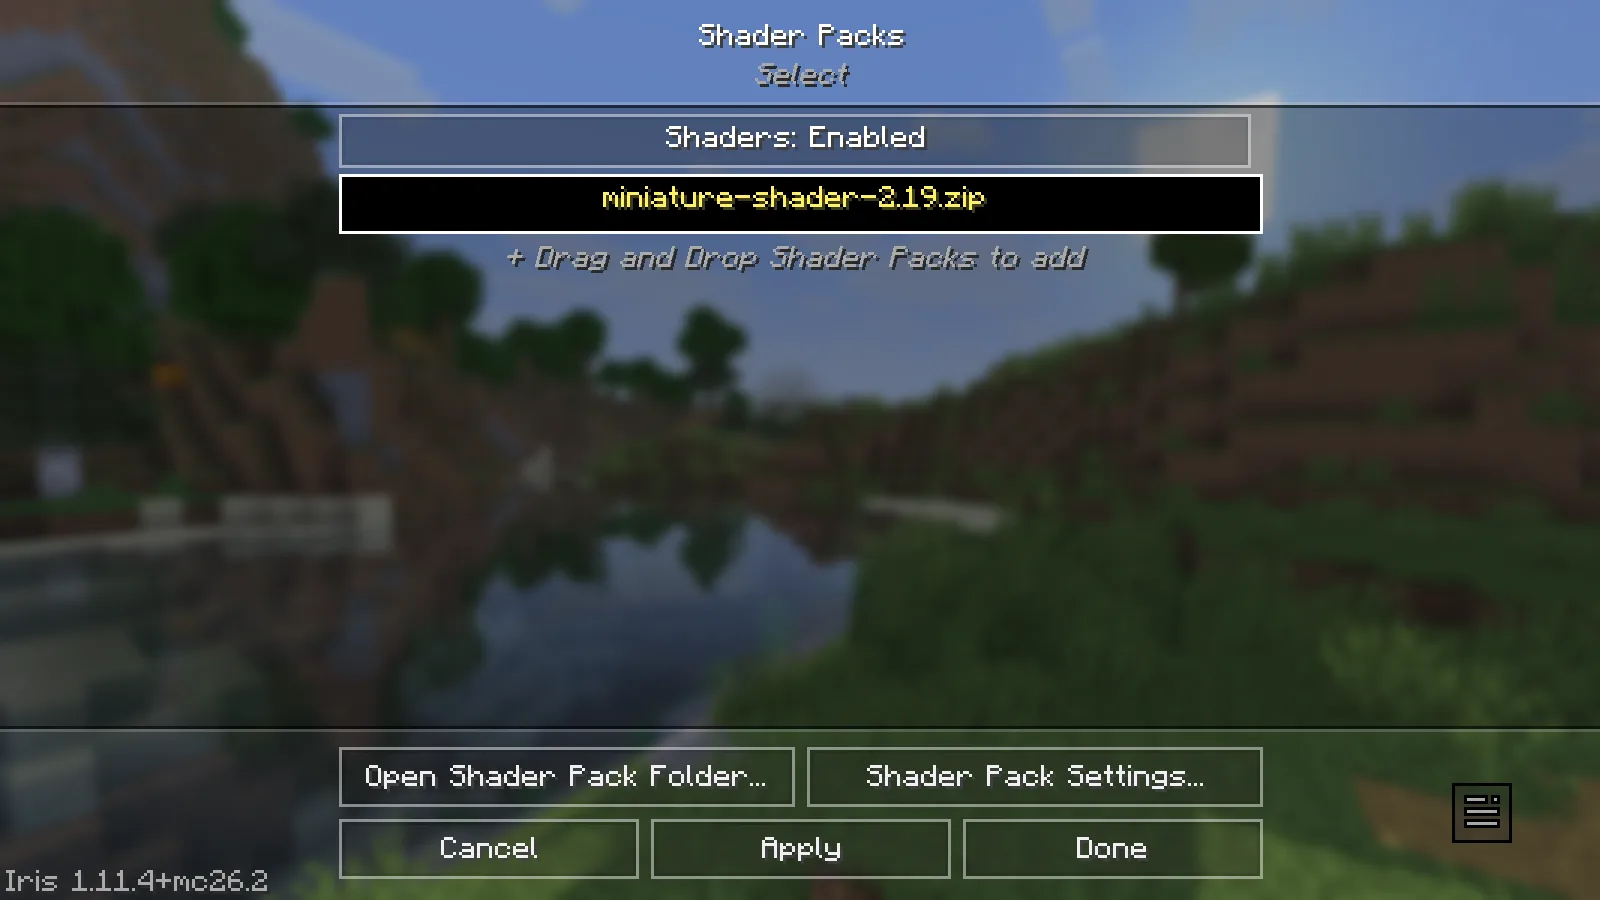
Select the ZIP and enable the shader in the running Iris instance.
Keep your first comparison simple: use the same world, default textures and the Normal preset. Once you know what the shader contributes, try another texture pack or adjust individual options.
This is a Java shader. Bedrock's Vibrant Visuals and resource packs are a separate system; putting this ZIP into a Bedrock world will not reproduce these views.
Make it comfortable to play with
Stand beside water, then turn toward trees or a busy build. If movement becomes uncomfortable, reduce render distance or choose a lighter shader setting before sacrificing the rest of your setup. For the cleanest comparison, switch the shader off and return to the same camera view.
During the day, look for readable paths and entrances as well as an attractive sky. At night, walk the route into your base rather than judging only a still image. A beautiful screenshot is less useful if you struggle to see the stairs you use every evening.
If the shader does not appear or load
- No Shader Packs menu: you probably launched an installation without Iris or another supported shader loader.
- The ZIP is missing from the list: open the folder from the active game's shader menu. Another instance can have its own shaderpacks folder.
- The game reports a shader error: check the exact shader-loader and Minecraft versions, then try without other visual packs.
- A newer file behaves differently: the archive keeps older releases available. Choose by compatibility, not just by the largest release number.
Miniature Shader is by ukrech / mateuskreuch. Modonix captured the comparisons and house scene in-game. Download a compatible release below and use Report if you find a problem with a particular file.
Comments & questions
Share what worked, ask for help or reply to another player.
No comments yet. Share what worked for you.