
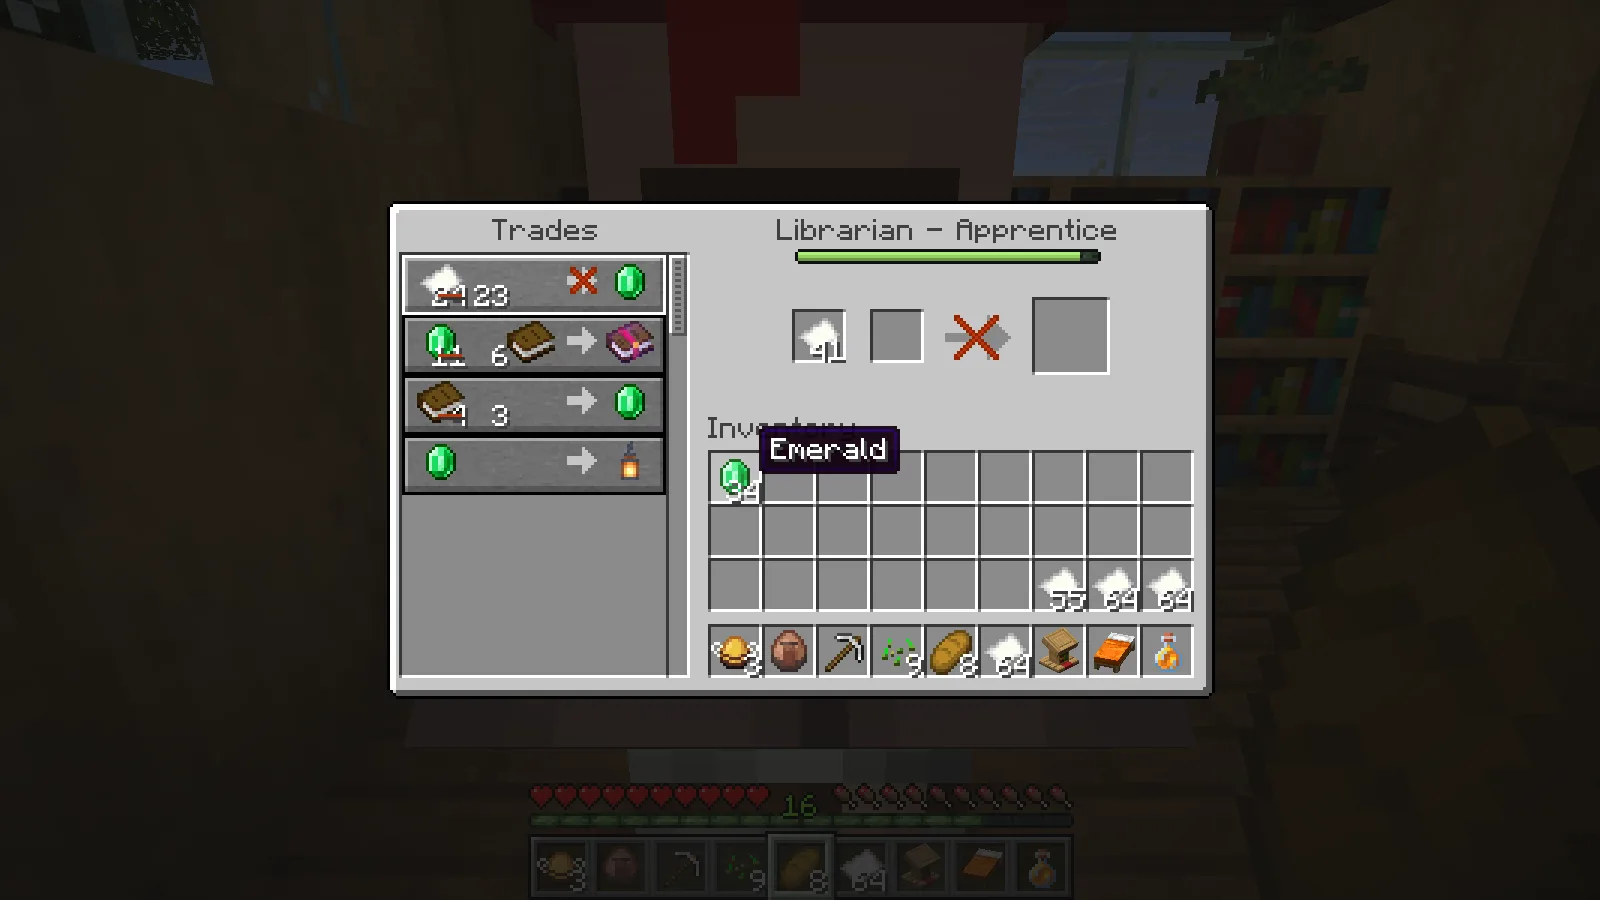
A librarian has a red cross on the paper trade, even though you brought enough paper. There is a lectern in the room, and the librarian next door seems fine. Before rebuilding the hall, check whether the sold-out librarian still has its own workstation.
This Java walkthrough follows two librarians in neighboring stalls. Both had already been traded with. The librarian on the left also offered Sharpness II, so we wanted to keep that villager and its book offer.
Check the crossed-out offer first
Select the affected trade and compare your input with the price currently shown. Do not assume every paper trade costs the same amount. Our librarian displayed 23 paper for one emerald, with the original price crossed out.
There was enough paper in the input slot, but the offer remained unavailable. Keep track of that particular row as you troubleshoot; other offers can still appear in the menu.
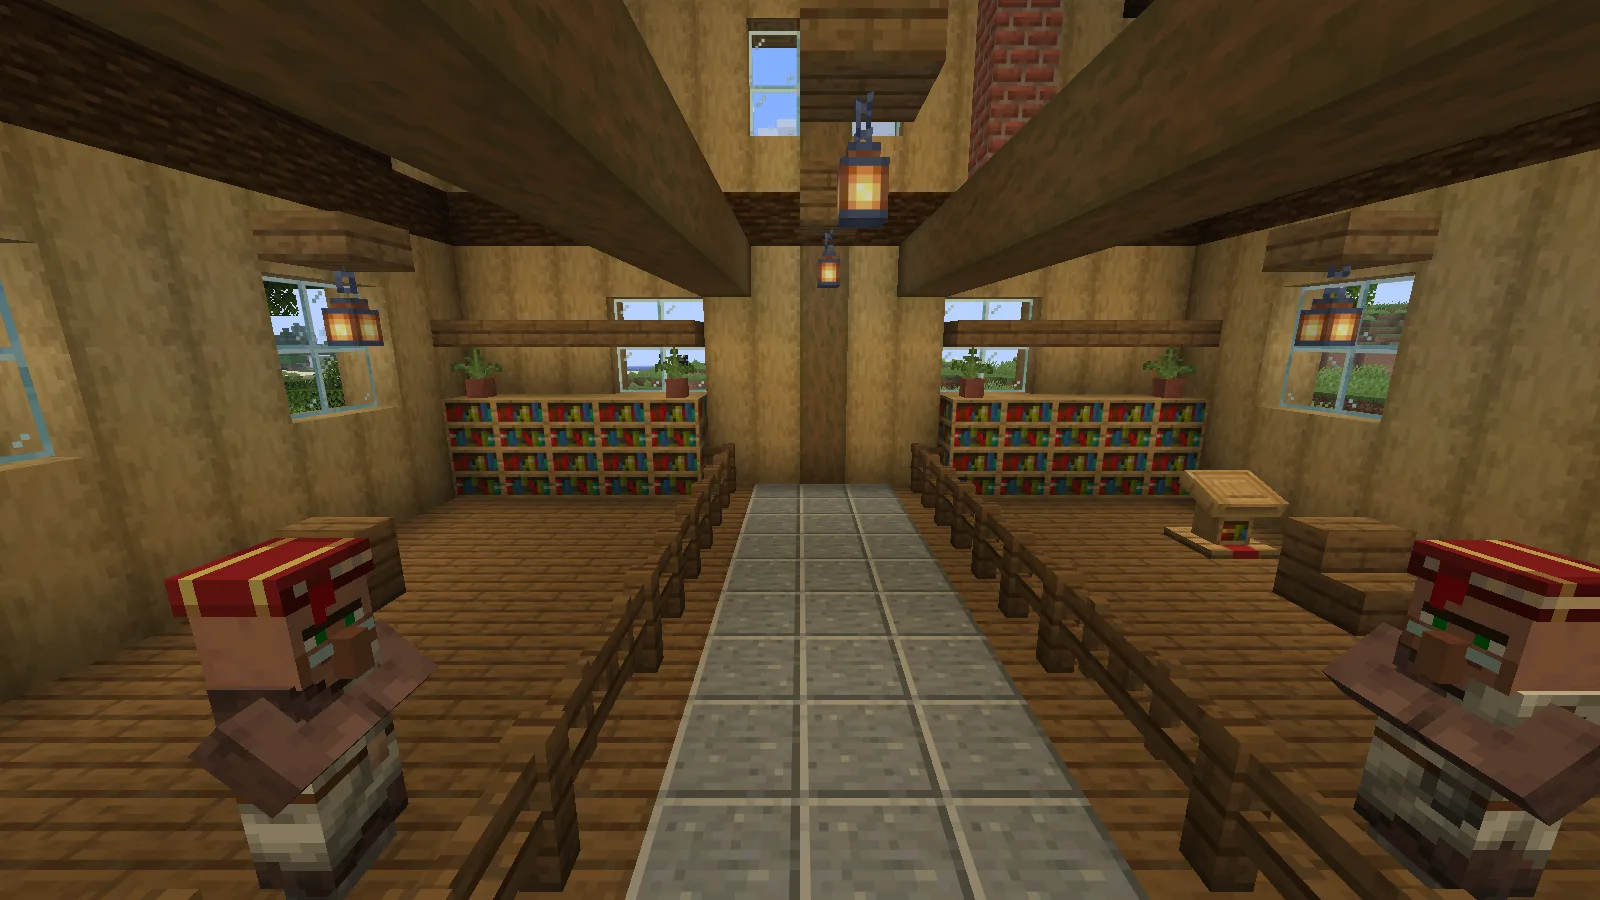
The next stall's lectern does not replace a missing one
In the room below, the left librarian has lost its lectern. The right librarian still has its own. Leaving that second lectern in place did not restore the left librarian's paper trade.
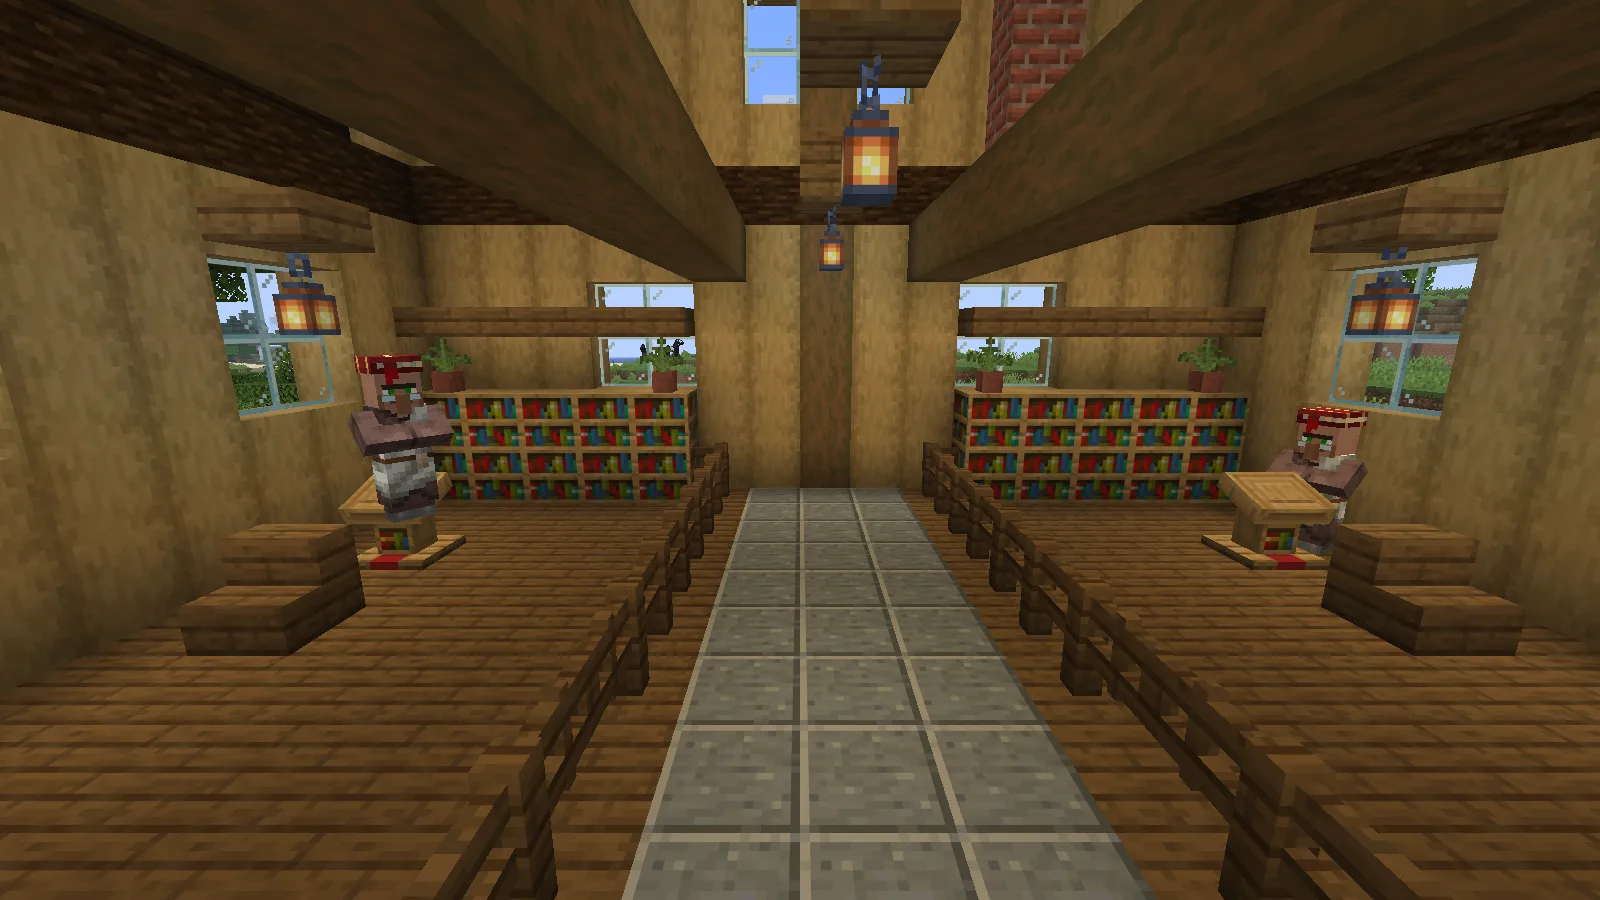
After sleeping through the night, we checked again during the next day's working period. The right librarian restocked; the left librarian's paper offer stayed exhausted. Morning alone had not solved the missing workstation.
In a crowded hall, start with one villager and one stall. Leave the neighbors' workstations in place while you work out what changed. Seeing another librarian work nearby does not tell you whether this one has a desk of its own.
Put the librarian's own lectern back
We restored the left librarian's lectern to its original position. The right librarian kept its existing lectern. The left librarian reclaimed the restored workstation, and the paper offer became available again.
- Identify the librarian whose offer is crossed out.
- If its known workstation is missing, replace it where that villager can use it.
- Close the trading menu and give the librarian an opportunity to work during the day.
- Reopen the same librarian and select the same exhausted offer.
Change one stall at a time. Moving every lectern while rearranging the enclosure makes it harder to tell which change helped.
Make one trade to confirm the fix
Once the output becomes available, take it and check that the exchange completes.
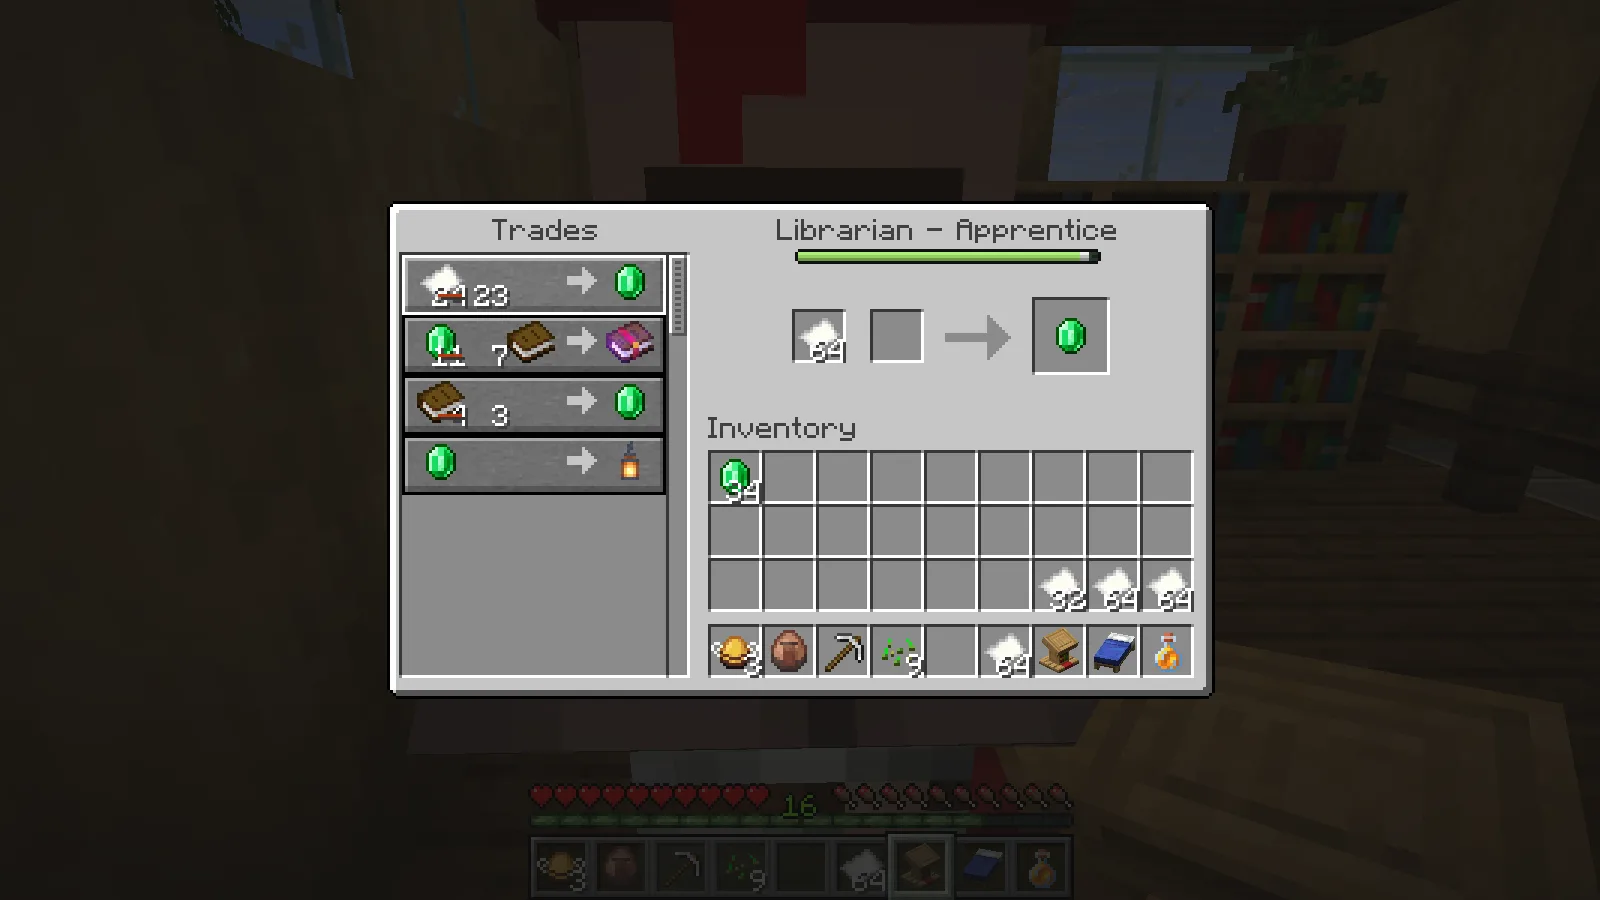
Paper exchanged for an emerald again, and Sharpness II stayed on the list.
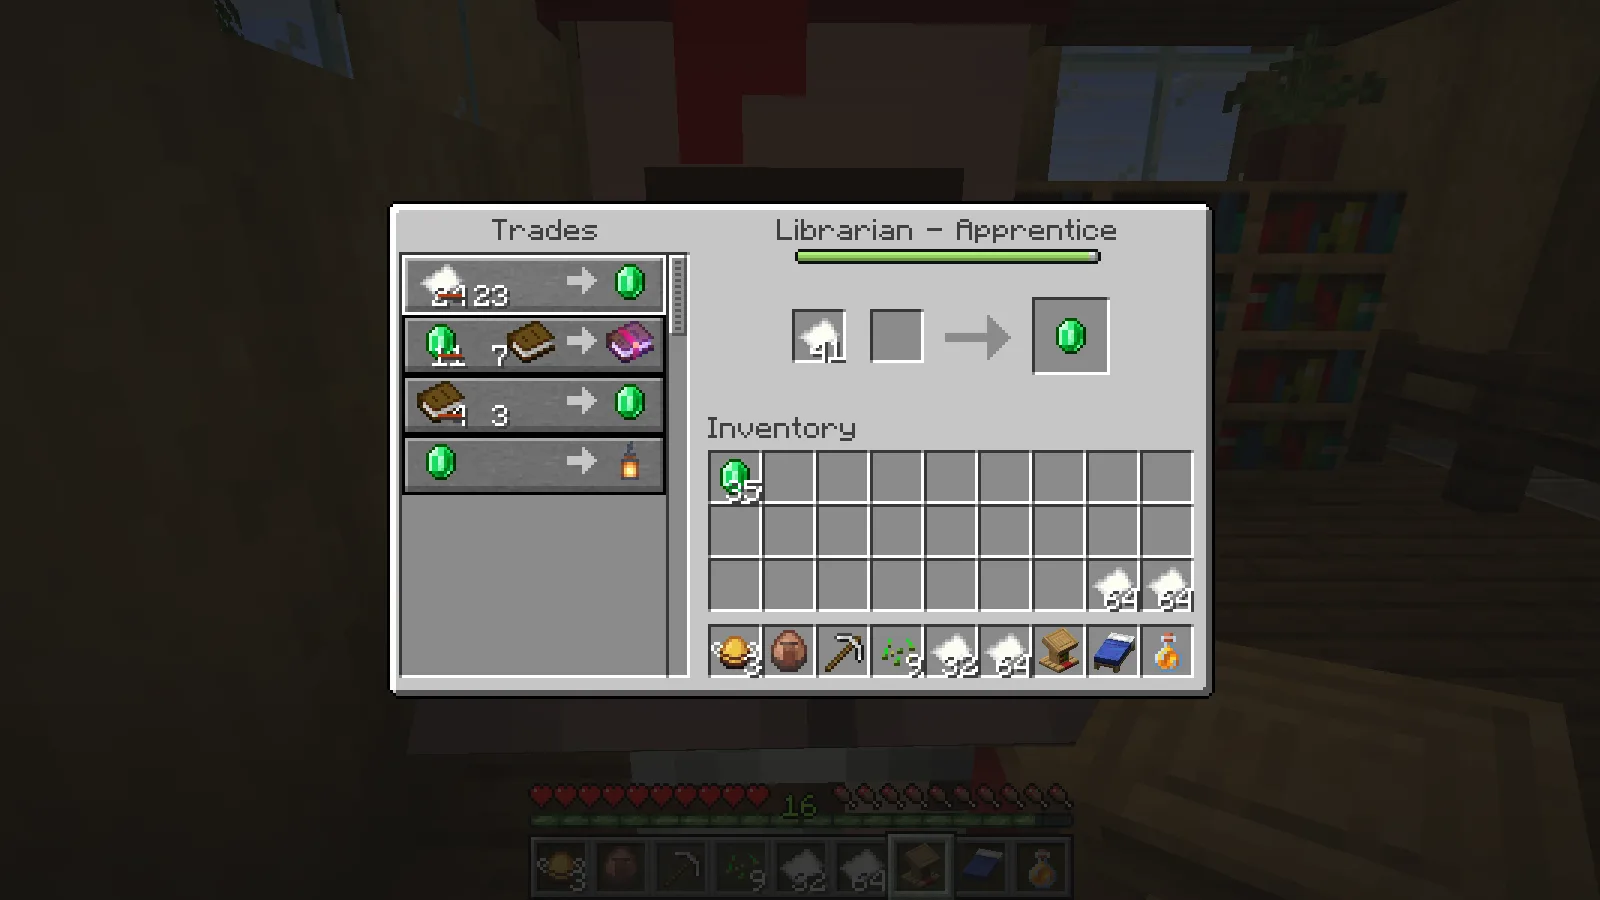
If a level-up adds new rows, return to the original exhausted offer instead of judging the repair by the new trades.
Still crossed out? Check the displayed input, confirm which workstation belongs to that librarian, and allow a daytime opportunity to work. Repeatedly reopening the menu or sleeping through another night does not replace a missing lectern.
Comments 0
Share what worked, ask for help or reply to another player.
Use your Modonix account to join the discussion and manage your comments.
Sign in to commentNo comments yet. Share what worked for you.