
Tom’s Simple Storage makes a room full of chests easier to use. Keep your supplies in ordinary containers, connect them and browse everything from one terminal. You can search for an item, move stacks in and out, then add a crafting grid without rebuilding the whole storage room.
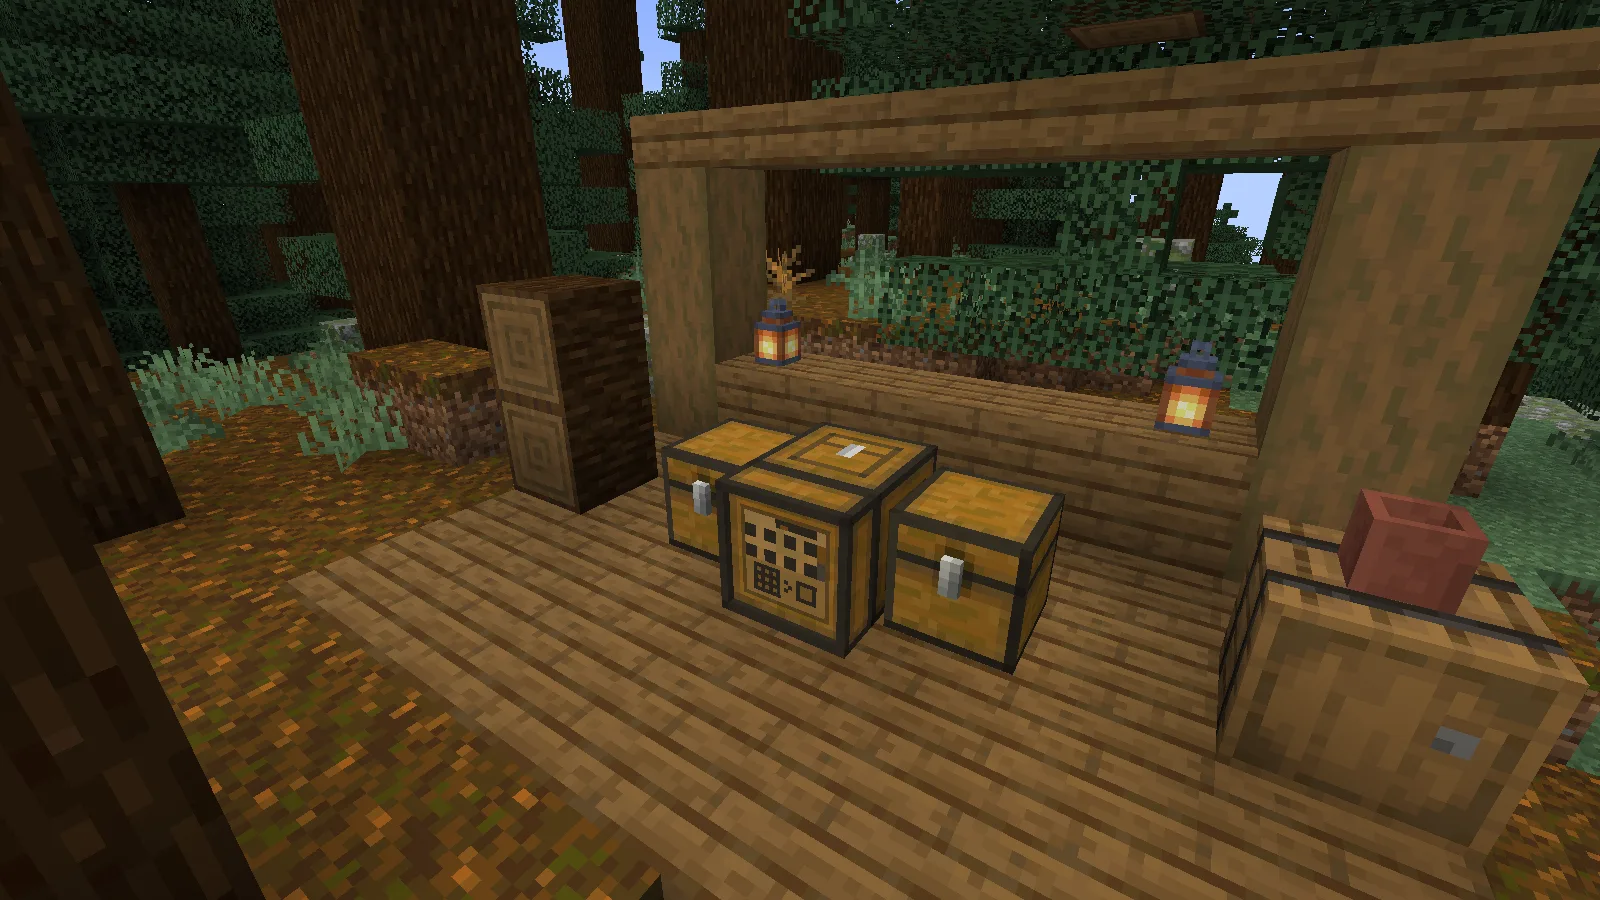
This starter setup uses two chests, one Inventory Connector and a terminal. It needs no generator or power cables. The screenshots follow a small working storage station built into a spruce-forest workshop.
Start with an Inventory Connector
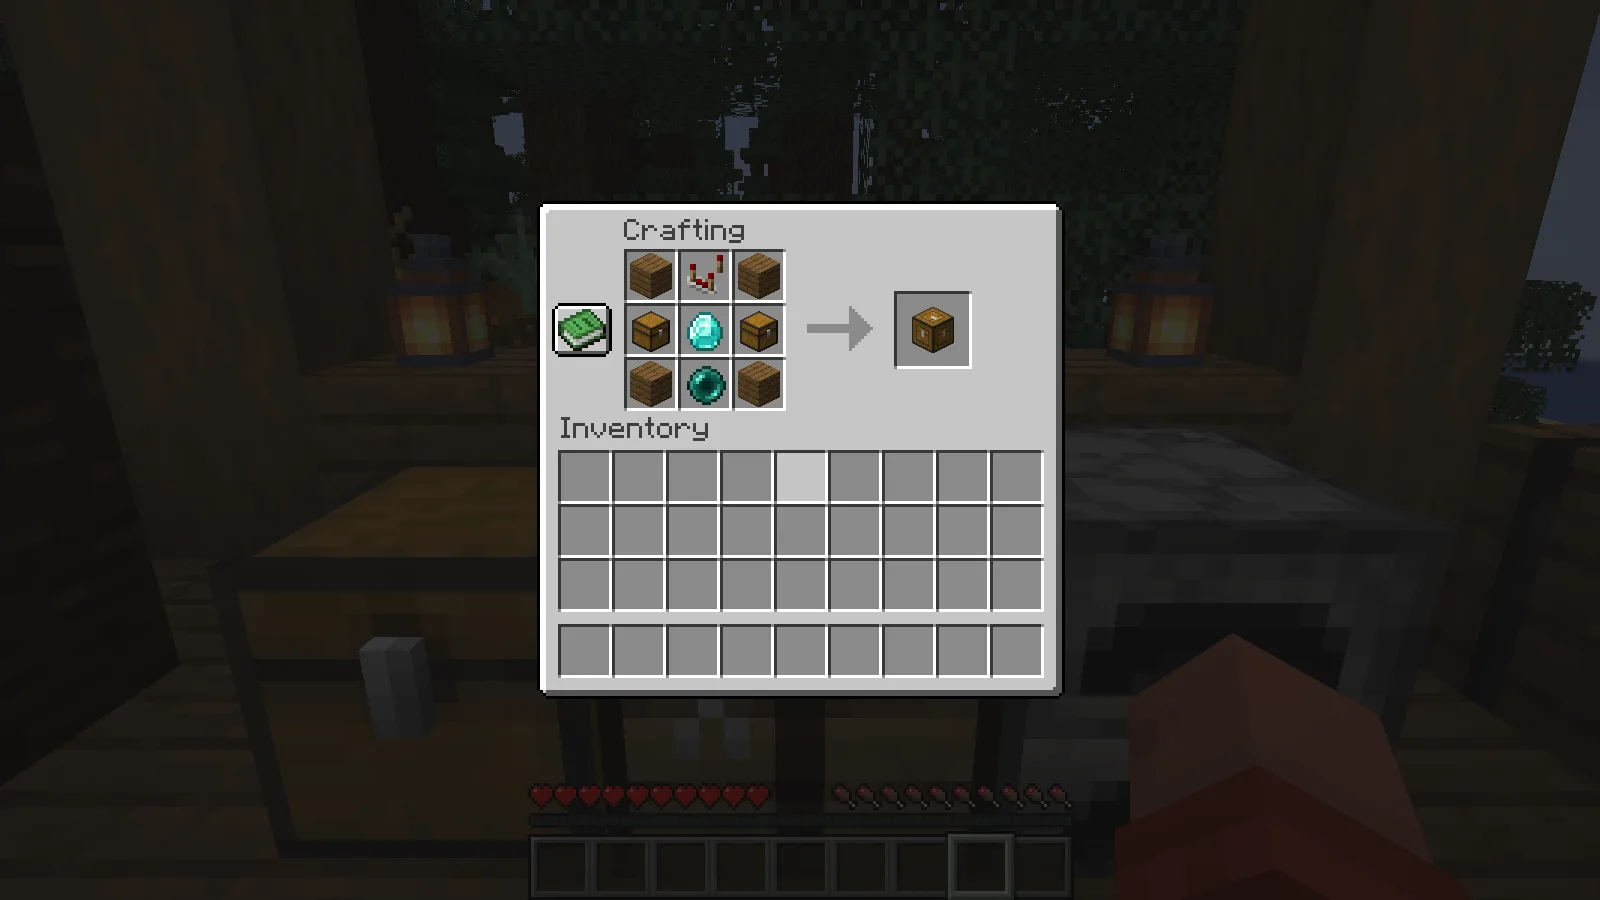
Craft the connector with four planks, two chests, one redstone comparator, one diamond and one ender pearl. The in-game recipe below shows where each ingredient belongs. Our example uses spruce planks.
Place the connector between the two storage chests so that both touch it. For this small layout, no inventory cables are needed. The connector gathers the connected containers into a shared inventory; it does not replace their physical storage space.
As the room grows, the mod also offers Inventory Trim for gaps and cables for longer connections. Those larger layouts were outside this check. Build the two-chest version first, confirm you can see both containers, then extend it one section at a time.
Make the terminal
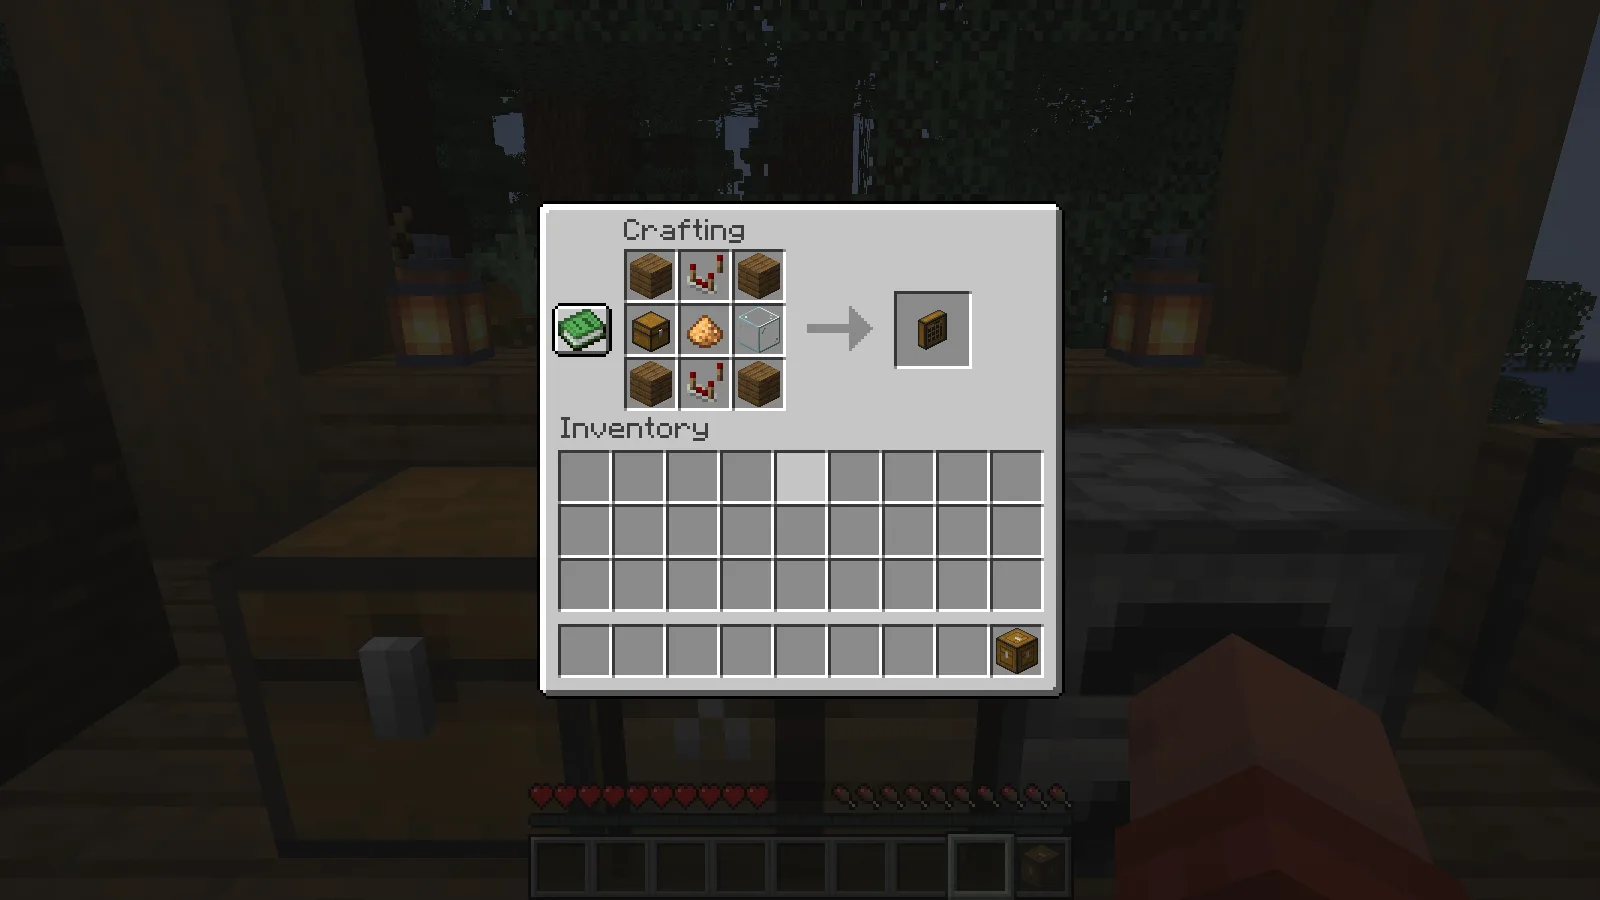
A Storage Terminal uses four planks, two redstone comparators, a chest, glowstone dust and a glass block. Put the terminal on the connector with its screen facing you. Right-click the screen to open the combined inventory.
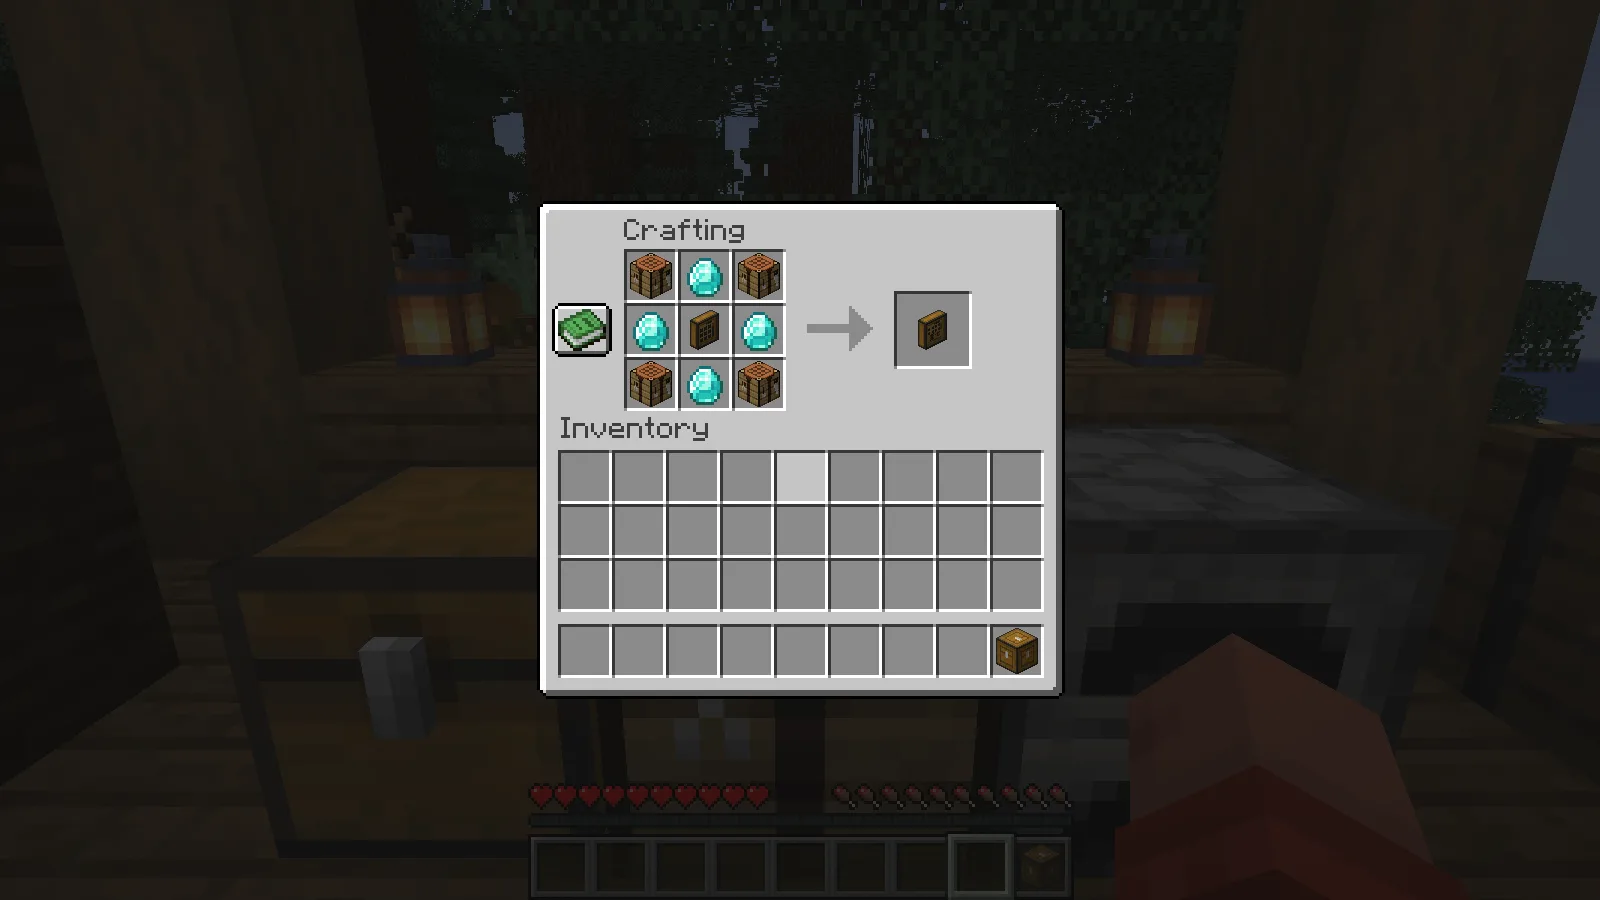
For crafting from the same screen, surround the Storage Terminal with four diamonds and four crafting tables, arranged as shown below. This produces a Crafting Terminal, which is the terminal used for the storage checks in this review.
In the workshop image, the connector is behind the screen, with a chest against each side. Both chests touch the connector. A screen next to the wrong face or a disconnected container will not give you the intended network; attach the terminal directly to the connector rather than leaving a gap.
Search once instead of opening every chest
We put 64 spruce planks and 16 diamonds in one chest, with 24 iron ingots and three apples in the other. The terminal displayed all four stacks together.
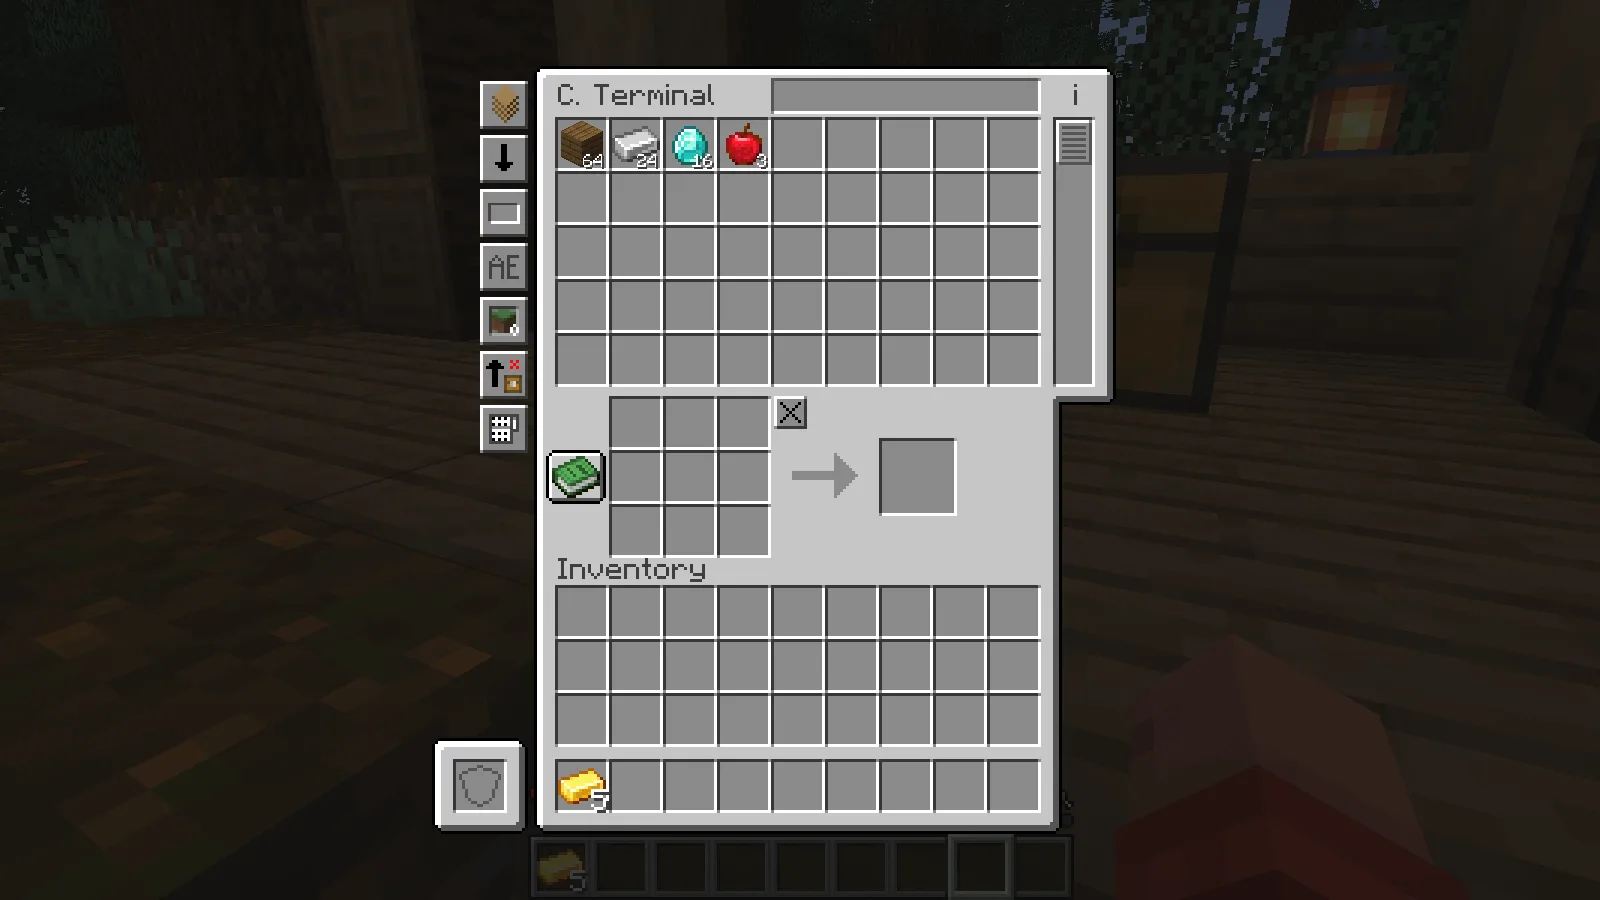
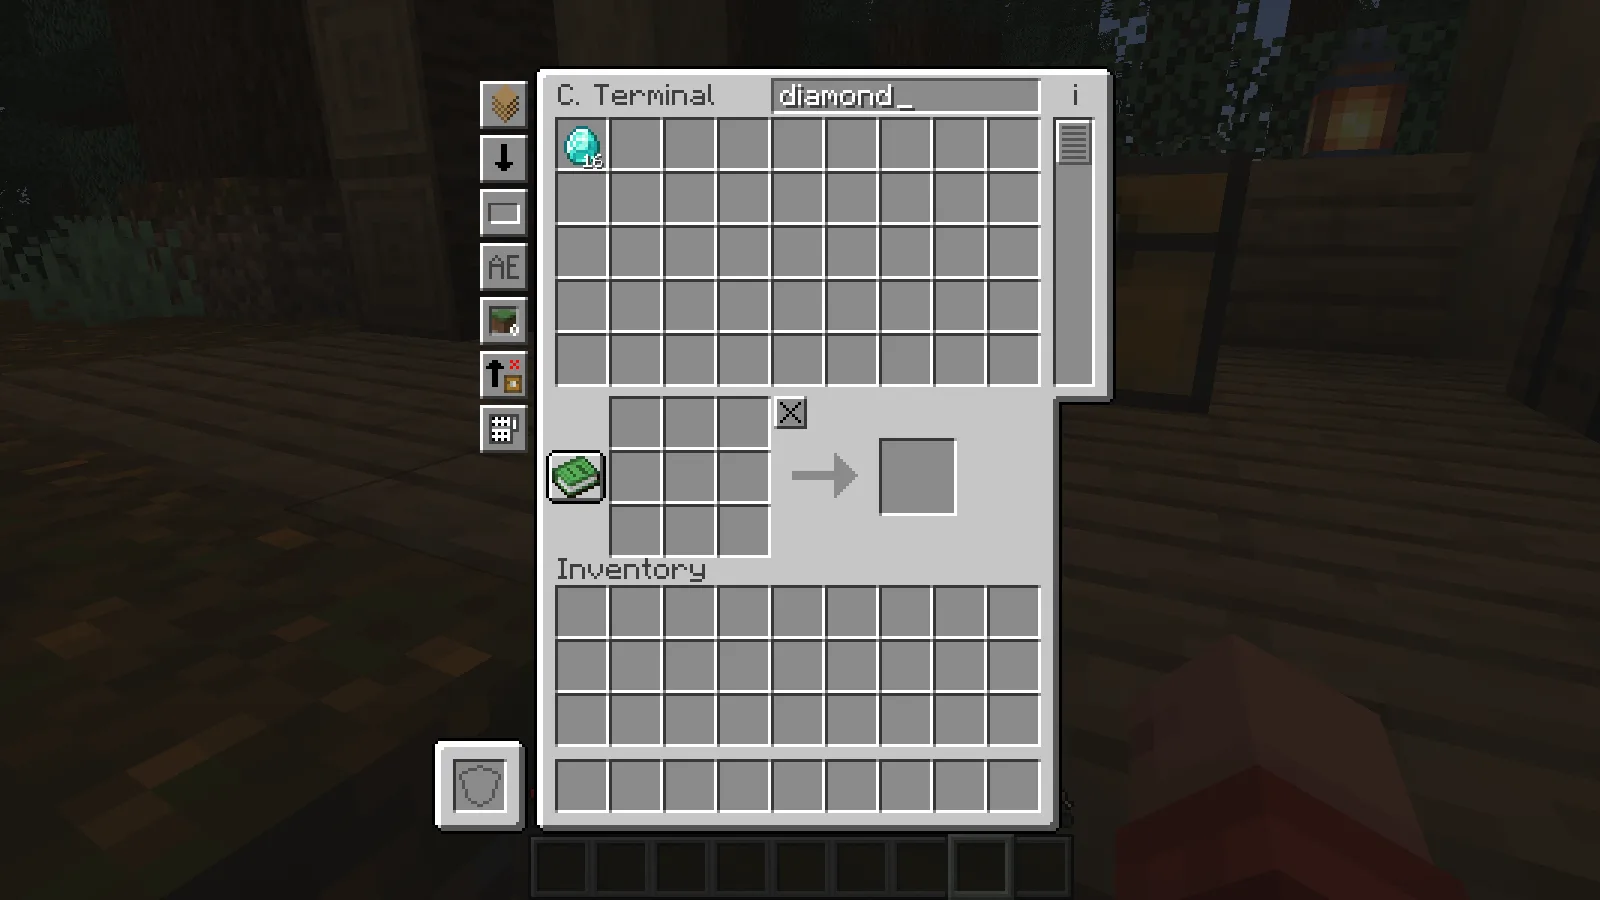
Click the search box at the top and type an item name. Searching for diamond left only the 16 diamonds in view. The search filters what you see; it does not remove the other supplies from their containers.
Left-click a displayed stack to pick it up, then click an empty player-inventory slot to take it with you. Shift-click a stack in your inventory to deposit it into the connected storage. We withdrew all 16 diamonds and deposited five gold ingots through the terminal, then checked the actual chest contents.
Returned items may go into a different connected chest. The terminal gives you access to the whole network; it does not promise to put each stack back into its old slot. Keep that in mind if you also open individual chests by hand.
Craft with your stored materials
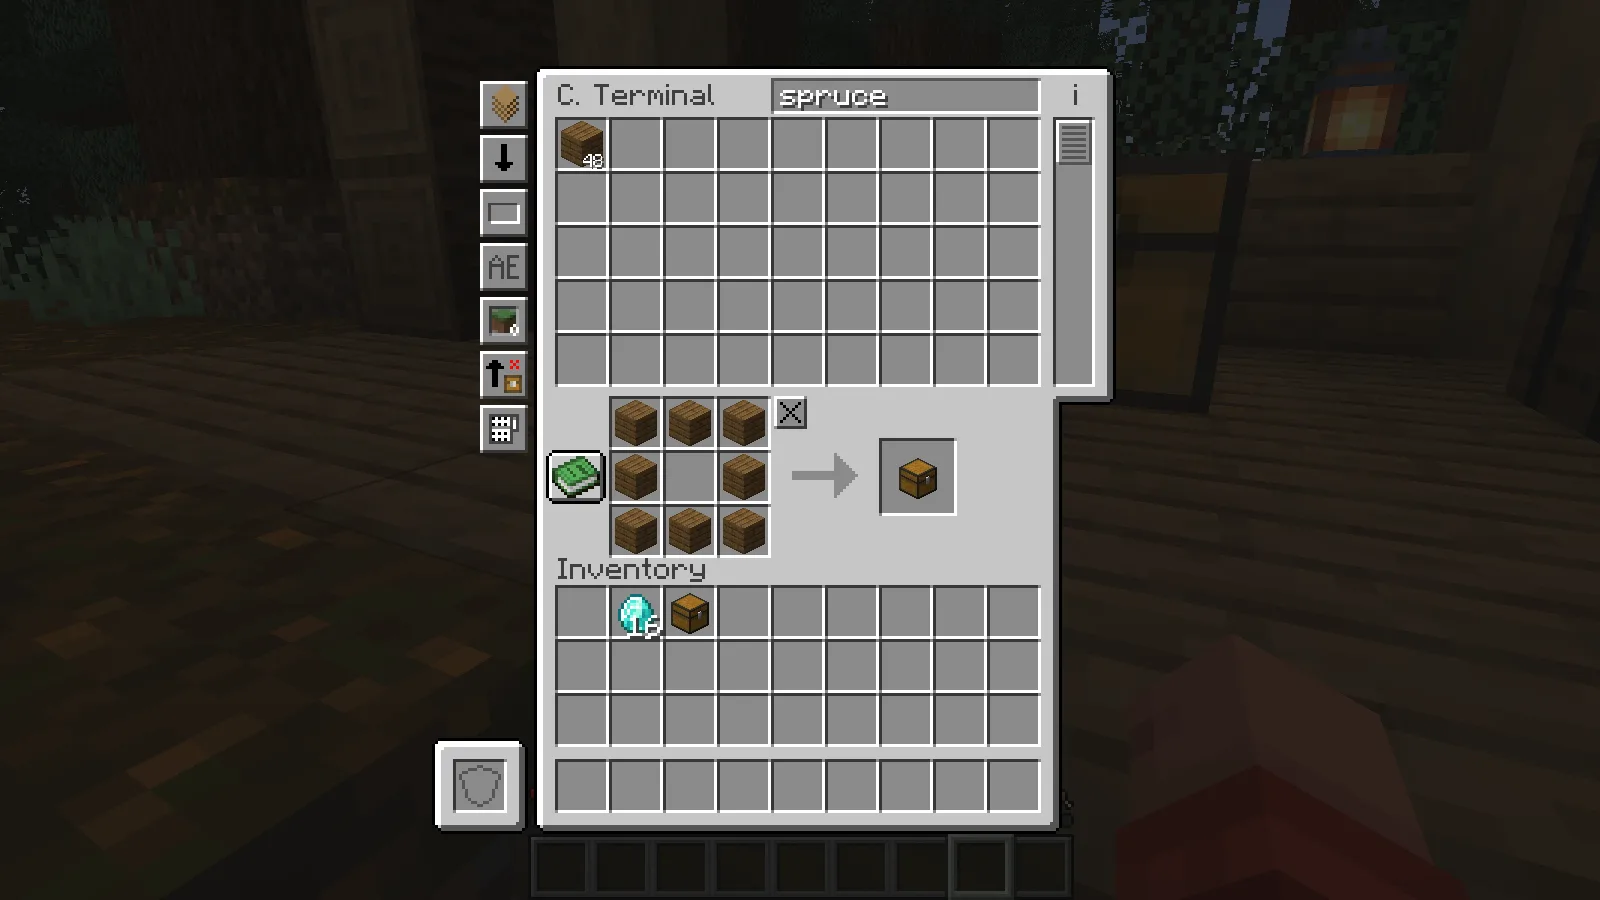
In the Crafting Terminal, take the spruce planks from the storage list and arrange eight around the empty centre of the 3×3 grid. Click the remaining carried planks back into the storage area, then collect the chest from the output slot.
The terminal refilled the recipe from stored planks after we took the finished chest. In the screenshot, one crafted chest is in the player inventory, eight planks are ready for another craft, and 48 remain in the storage list.
Use the X beside the crafting grid when you are finished to return its ingredients to storage. After clearing the grid, our network contained 56 planks: eight fewer than the starting stack, matching the one chest we had made. The deposited gold and returned diamonds were still present.
Install the matching Java release
Choose the matching Tom’s Simple Storage file in Files, close Minecraft and put its JAR in the active instance’s mods folder. Reopen the game to craft the connector and terminal. Optional integrations are separate from this two-chest setup.
For multiplayer, install matching files on clients and server. The two-chest layout above is a starting point; wireless terminals, remote chunk access and other integrations have their own setup.
Comments 0
Share what worked, ask for help or reply to another player.
Use your Modonix account to join the discussion and manage your comments.
Sign in to commentNo comments yet. Share what worked for you.