
Sophisticated Backpacks turns one inventory slot into a portable supply kit. Start with a 27-slot backpack, expand it to an Iron Backpack with 54 slots, then add a Pickup Upgrade to collect the materials you want to carry. This walkthrough builds that small, useful setup from scratch and shows what happens to the items already inside.
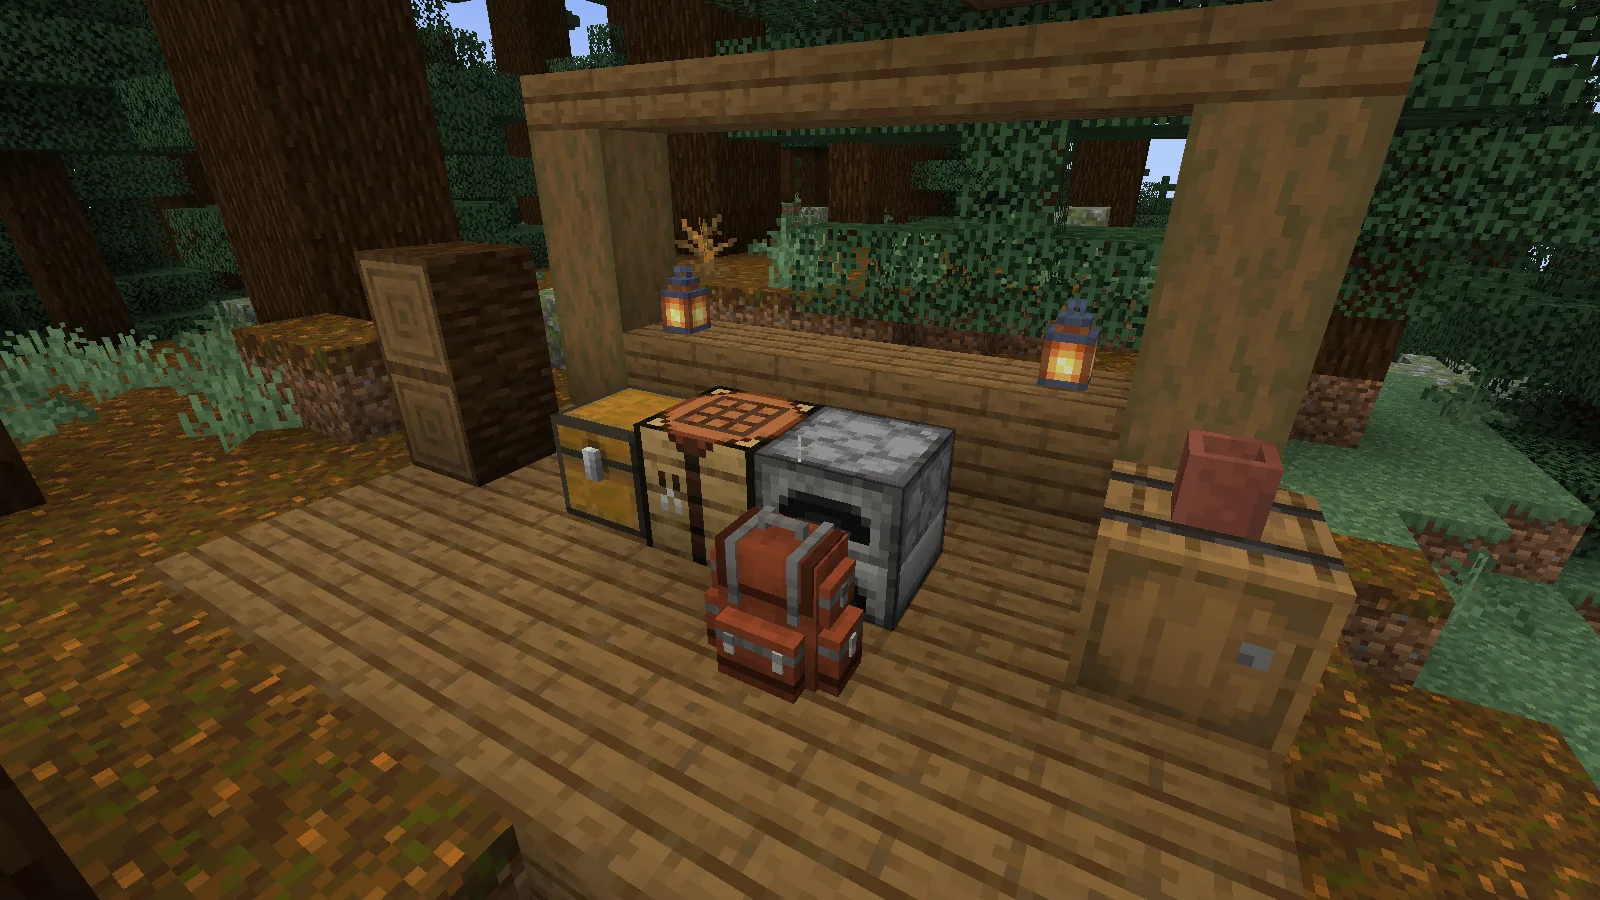
Craft a backpack and open it
The starting recipe uses four string, four leather and one chest. Put them in a crafting table as shown below. The output is the ordinary Backpack, with three rows of storage.
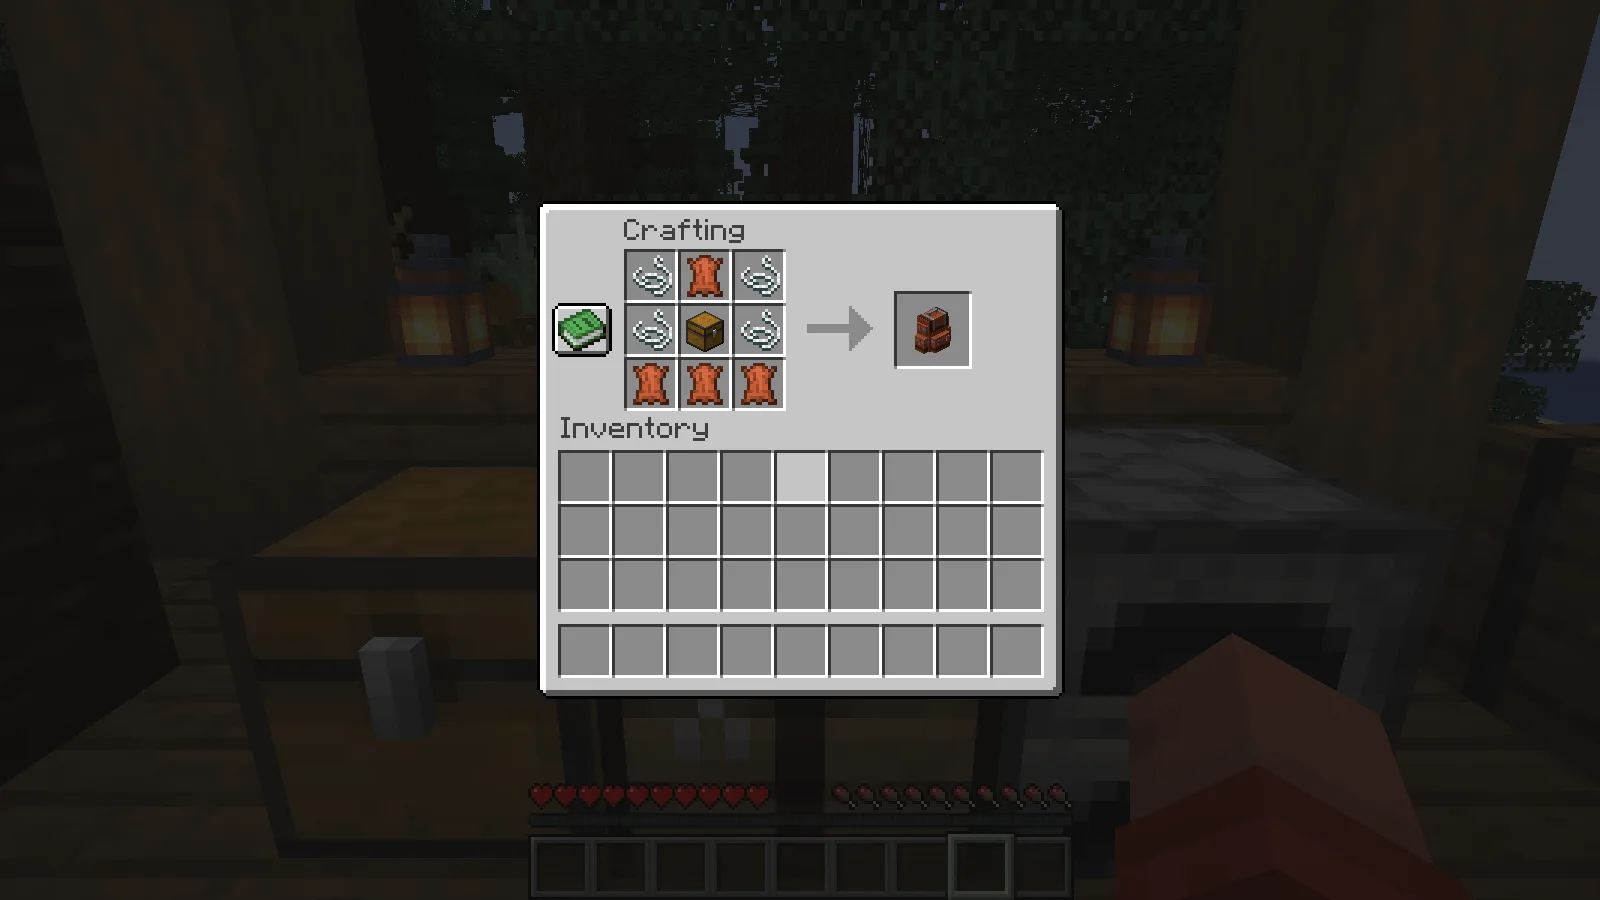
Carry it in your inventory and press B to open it with the default key binding. If B does nothing in a modpack, check Minecraft’s Controls for the backpack binding and any conflicts. Move your supplies into its grid just as you would with a chest. Keep your pickaxe and frequently used food on the hotbar; put spare supplies and collected resources in the backpack.
Double the space with iron
For the tested Minecraft 1.21.1 release, surround the ordinary Backpack with eight iron ingots. This makes an Iron Backpack with 54 storage slots. This recipe goes directly from the basic backpack to iron.
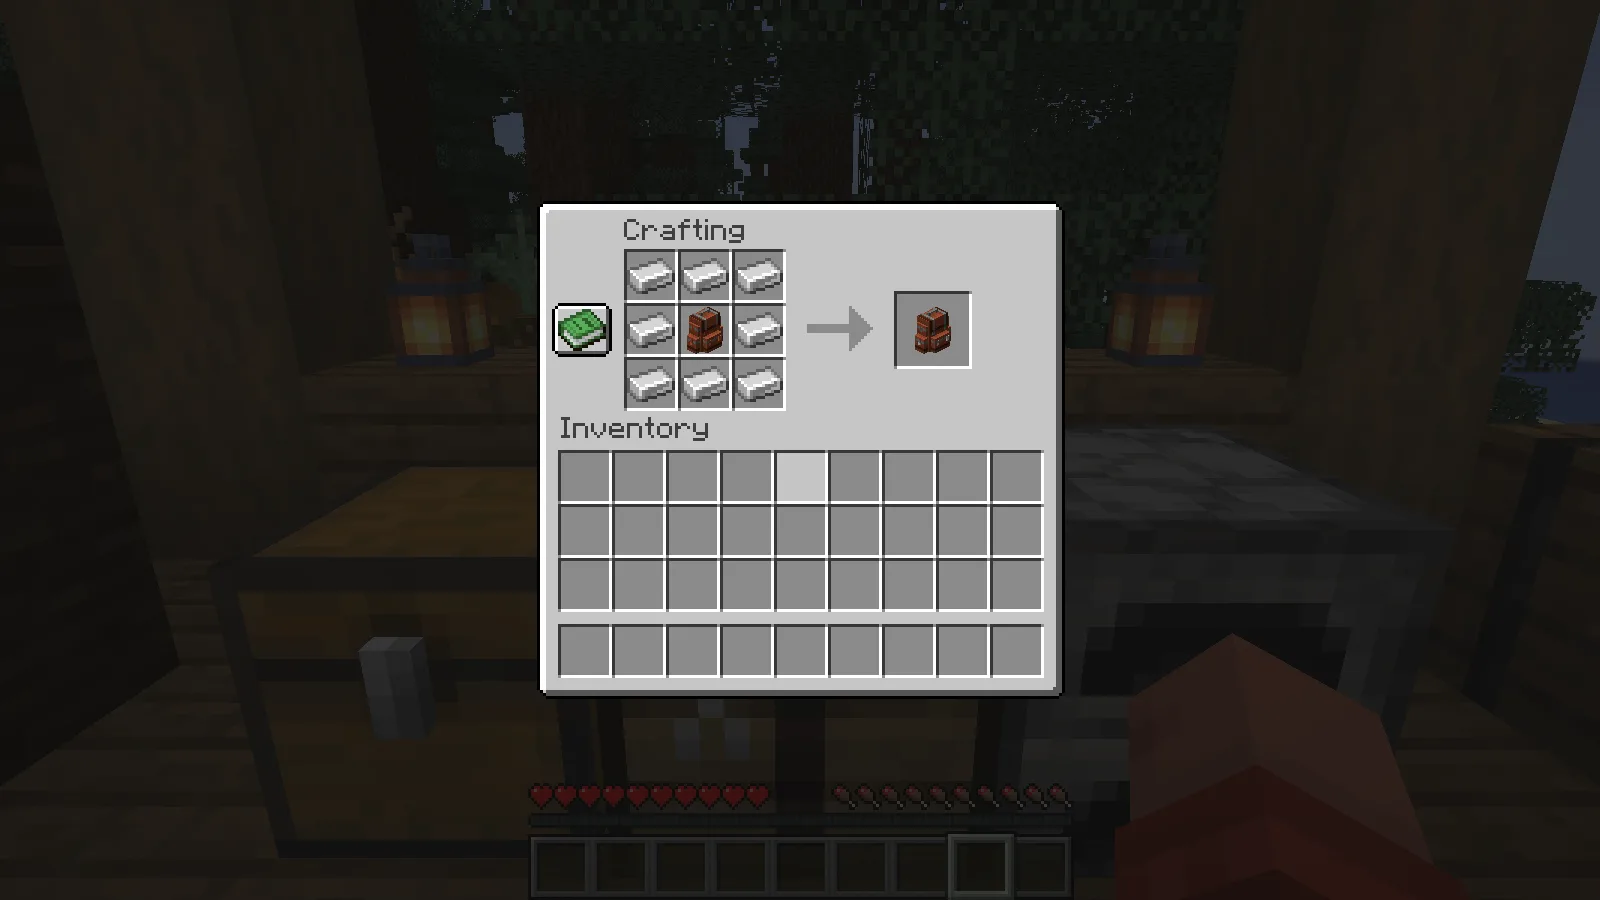
We upgraded a backpack containing seven diamonds and three apples. Both stacks remained inside the Iron Backpack, in the same slots. You can see the filled result below: the upgrade expands the container without making you unload it first in this release. Keep a world backup before changing mod versions, especially when valuable supplies are stored inside.
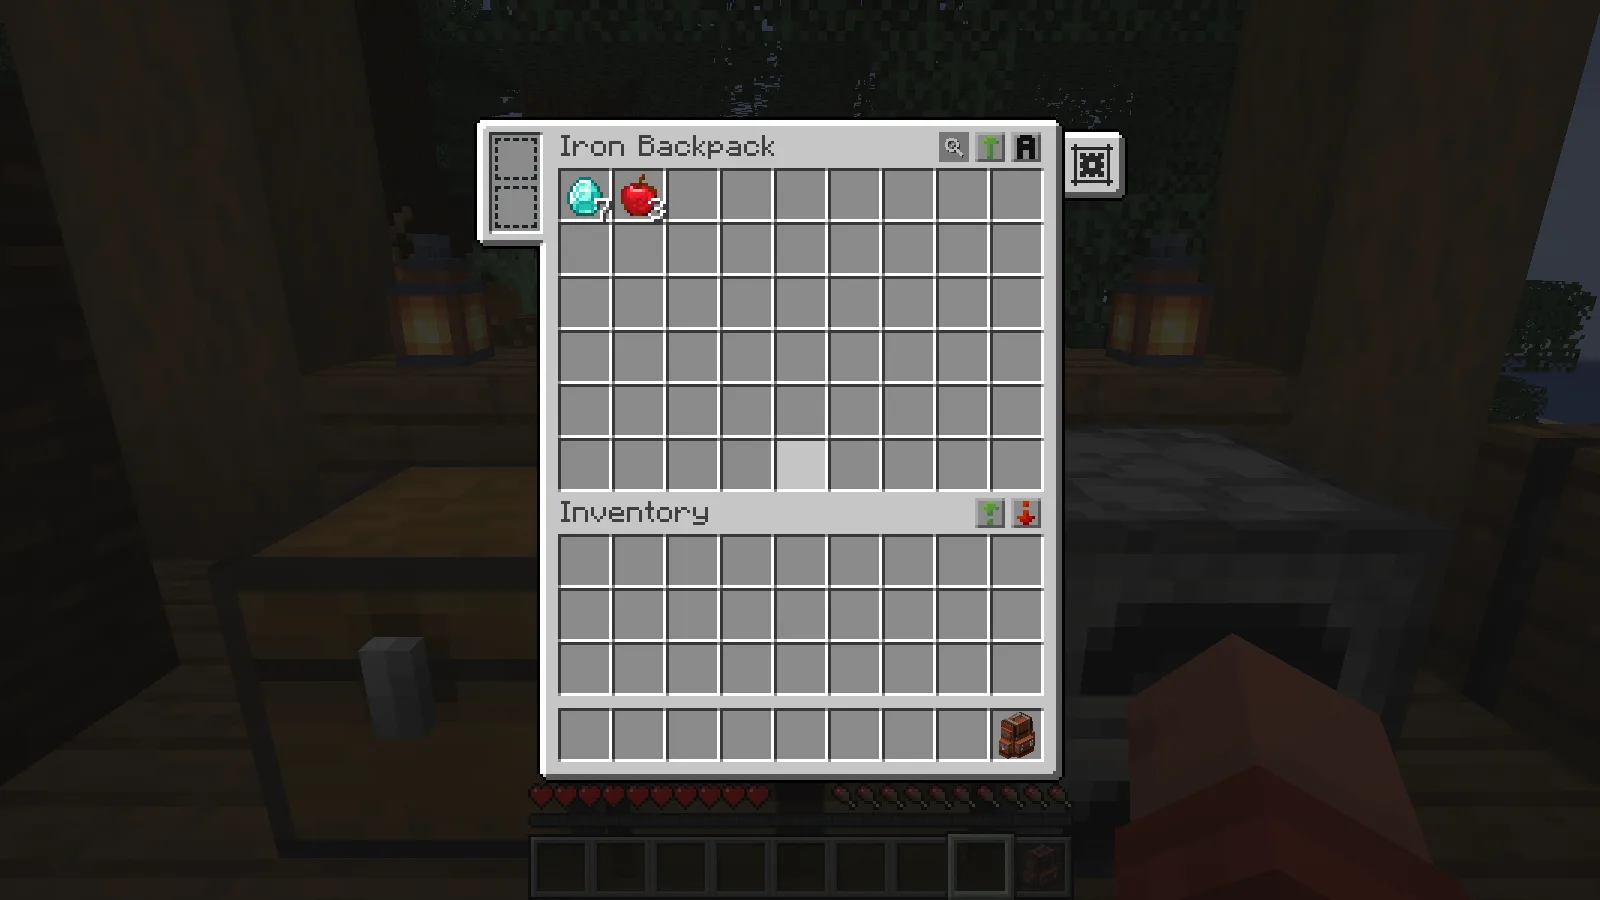
Add automatic pickup
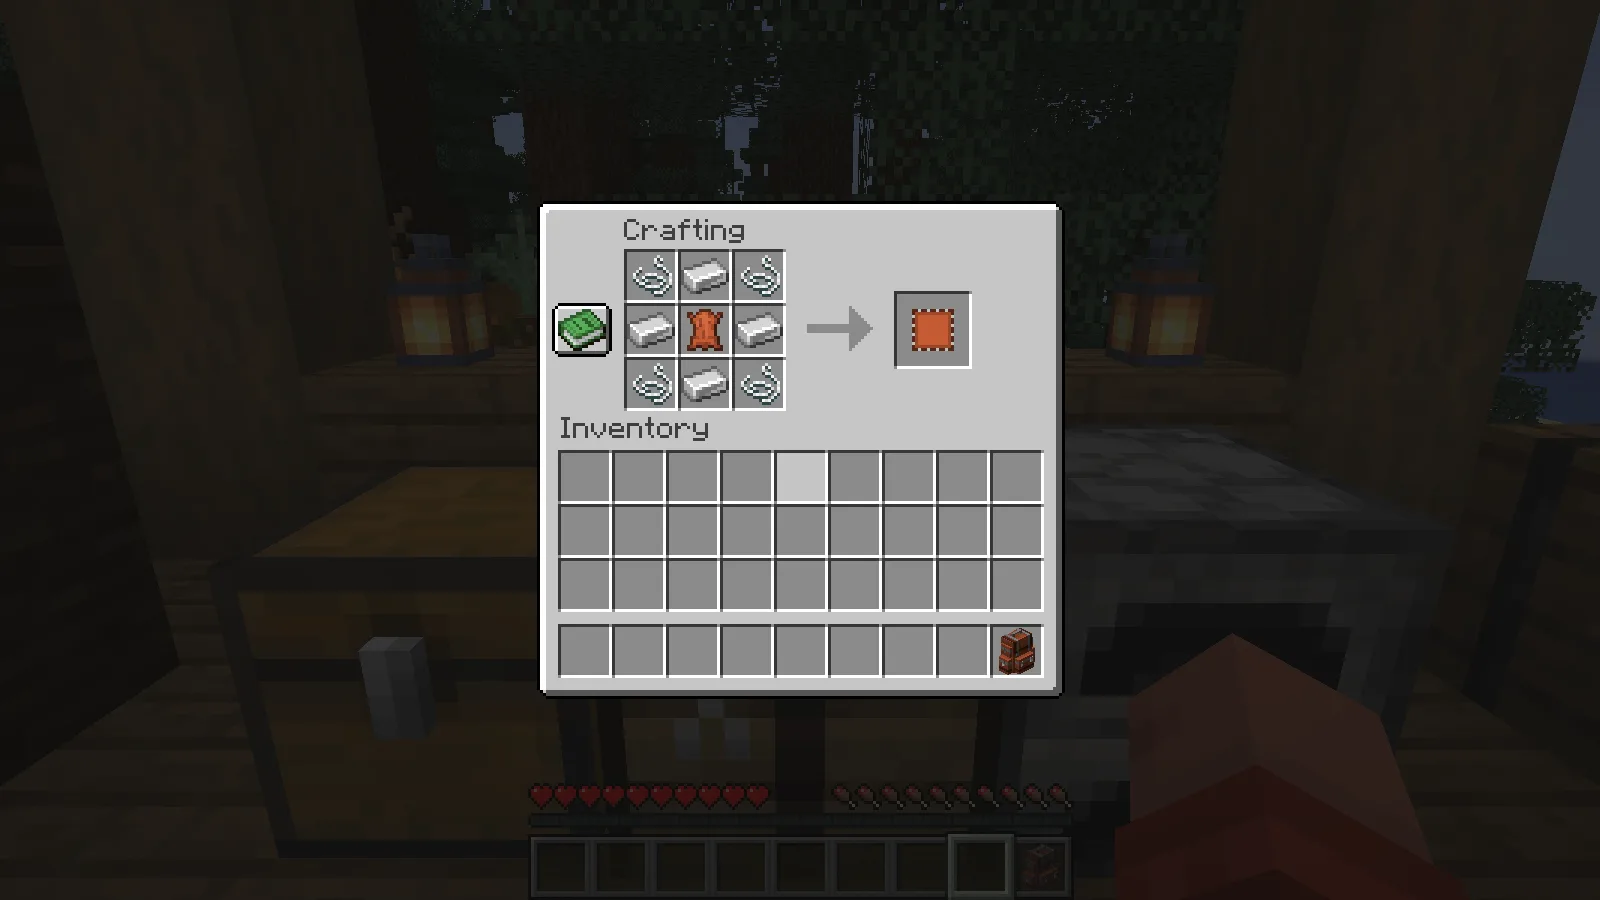
A Pickup Upgrade can send collected items straight into the backpack. First craft an Upgrade Base from four string, four iron ingots and one leather. The base is an ingredient for the working upgrade; it does not collect items on its own.
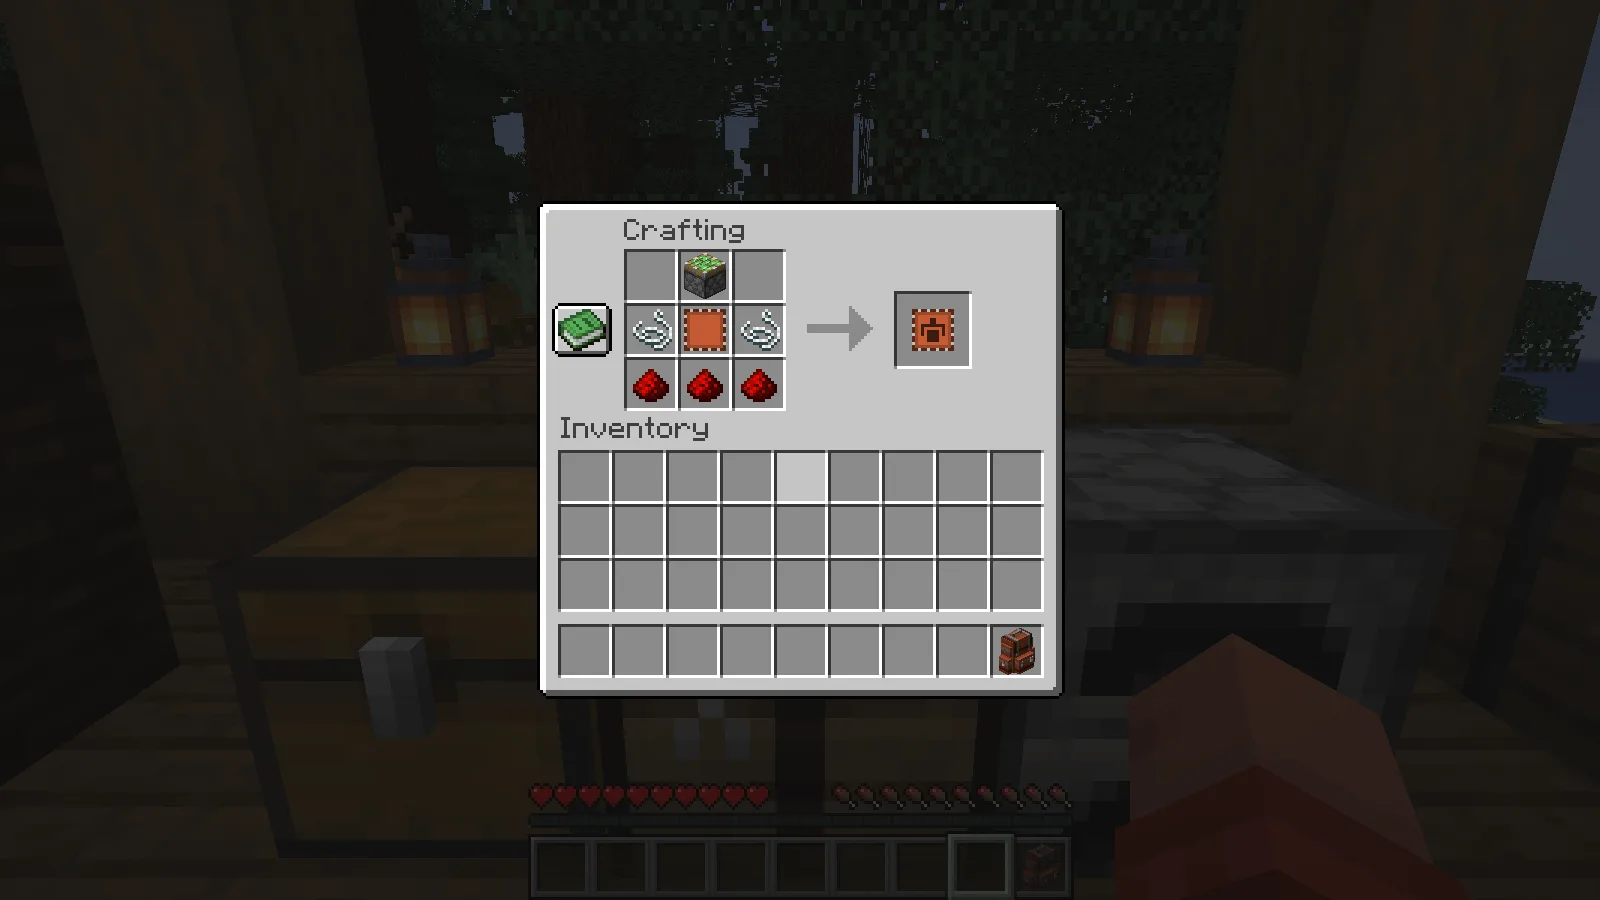
Next combine the Upgrade Base with a sticky piston, two string and three redstone dust. The screenshot shows the complete Pickup Upgrade recipe.
Open the backpack and put the finished Pickup Upgrade into an upgrade slot on the left. Open its settings tab on the right. For a simple mining setup, choose Match Backpack Contents and place a sample of each material you want to collect inside the backpack. This mode uses the stored contents as its list, so give it something to match before heading out.
Our backpack began with seven diamonds and three apples. With that mode selected, picking up two more diamonds increased the backpack’s stack to nine. Five cobblestone went into the player’s ordinary inventory instead. The settings tooltip, stored diamonds and cobblestone in the hotbar are visible together below.
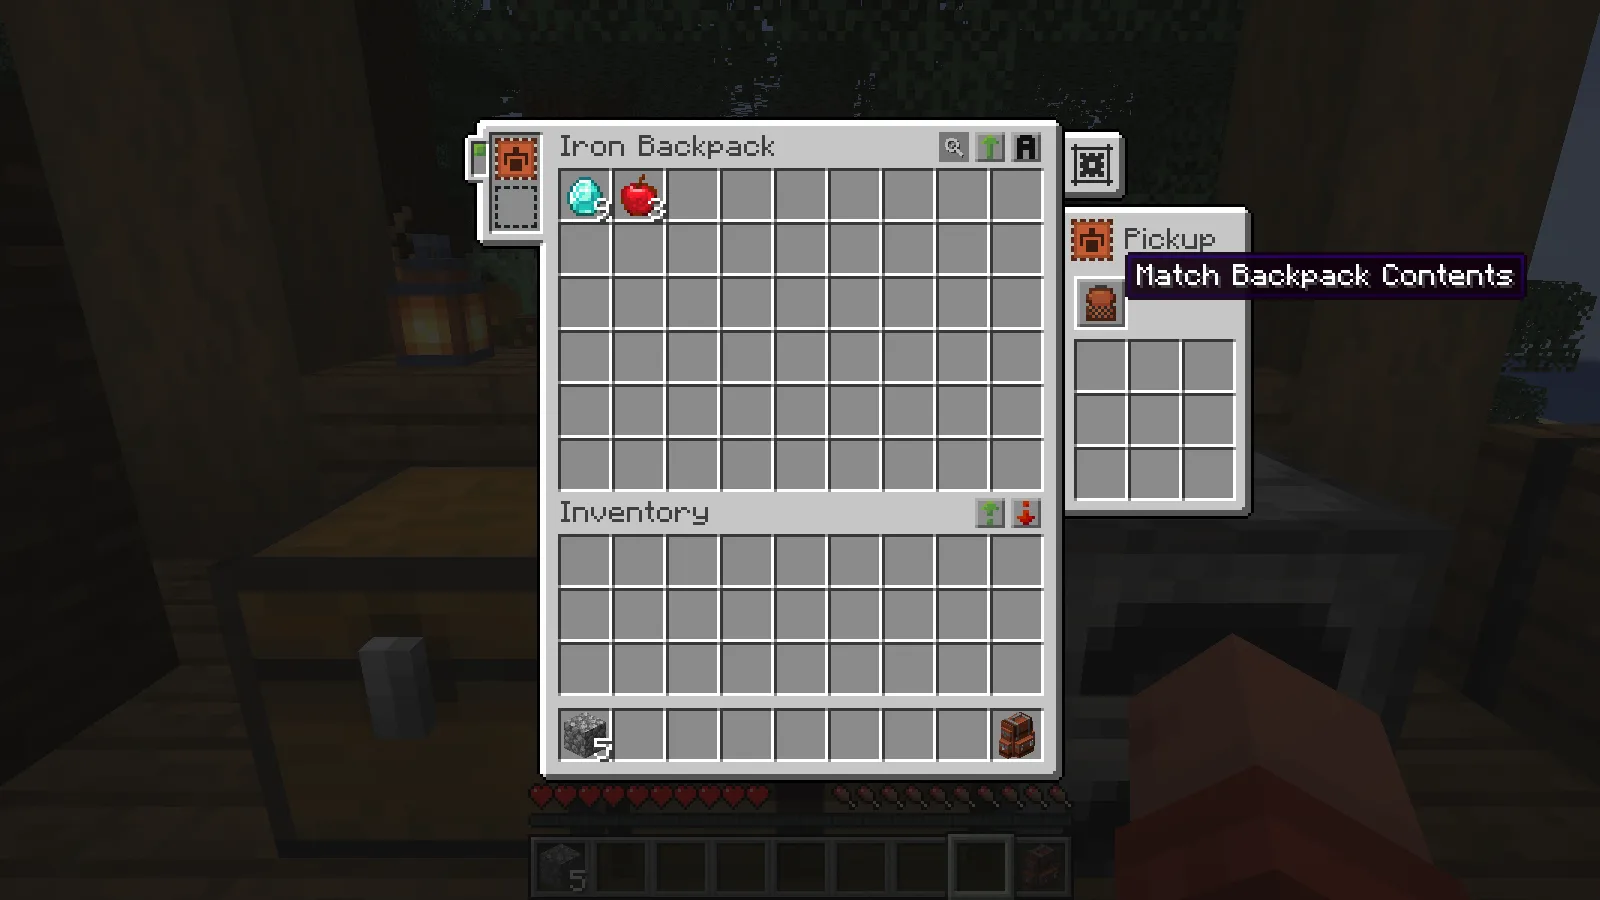
The filter controls what enters the backpack. It does not stop unwanted items from filling your normal inventory. If your goal is to leave cobblestone behind, this setting alone will not do that. It is useful for keeping selected supplies together while you decide what to keep or discard elsewhere.
Set up a temporary camp
To put the backpack down, select it, crouch and use it on a block. Interact with the placed backpack to open its storage. To carry it again, crouch and use an empty hand on it. You can then open it with B from your inventory.
The filled backpack keeps its cargo when you place it, open it on the ground and pick it up again. It also keeps that storage between sessions, making it useful as both a carried kit and a temporary camp container.
Choose the right file
Install Sophisticated Backpacks and its required Sophisticated Core together in your instance’s mods folder. Choose their matching files in Files, then reopen Minecraft. The creator block has the official dependency resource.
For shared play, install matching files on the client and server.
This walkthrough covers ordinary storage, the iron upgrade and Pickup Upgrade. Other upgrades are outside its scope.
Comments 0
Share what worked, ask for help or reply to another player.
Use your Modonix account to join the discussion and manage your comments.
Sign in to commentNo comments yet. Share what worked for you.